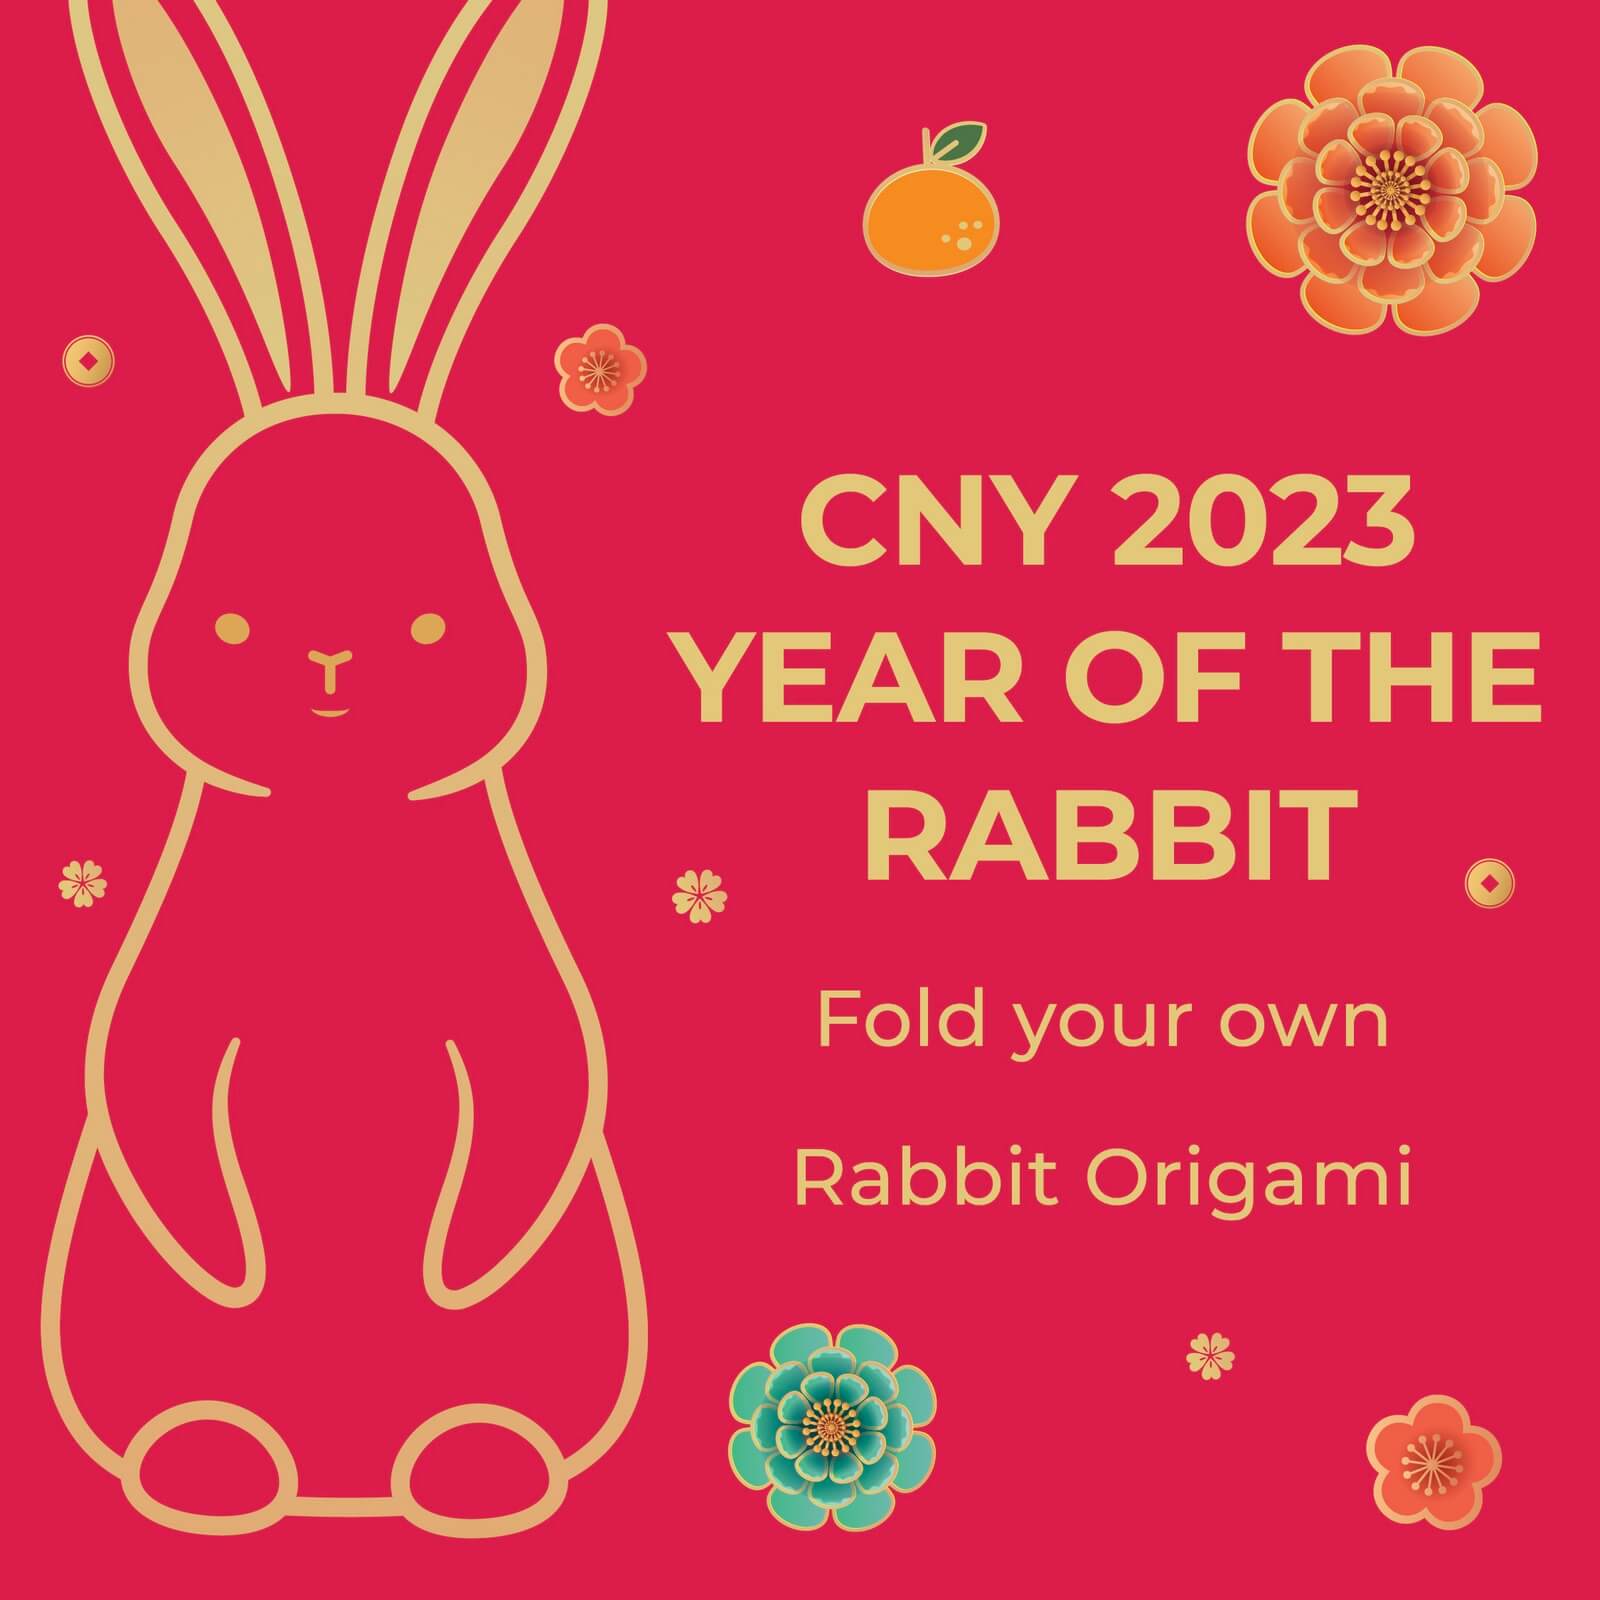
Happy Chinese New Year 2023!
The Year of the Rabbit is right around the corner! Thinking about how to spruce up your Chinese New Year deco with easy DIY crafts? We have a cool rabbit origami craft for you! Grab a few pieces of origami paper – like the colourful one that came with your Radium Development Greeting Card – and get creative!
Follow these easy step-by-step instructions to fold your own cute rabbit origami for the Year of the Rabbit 2023. For this rabbit origami, you will need to start with a square sheet of origami paper.
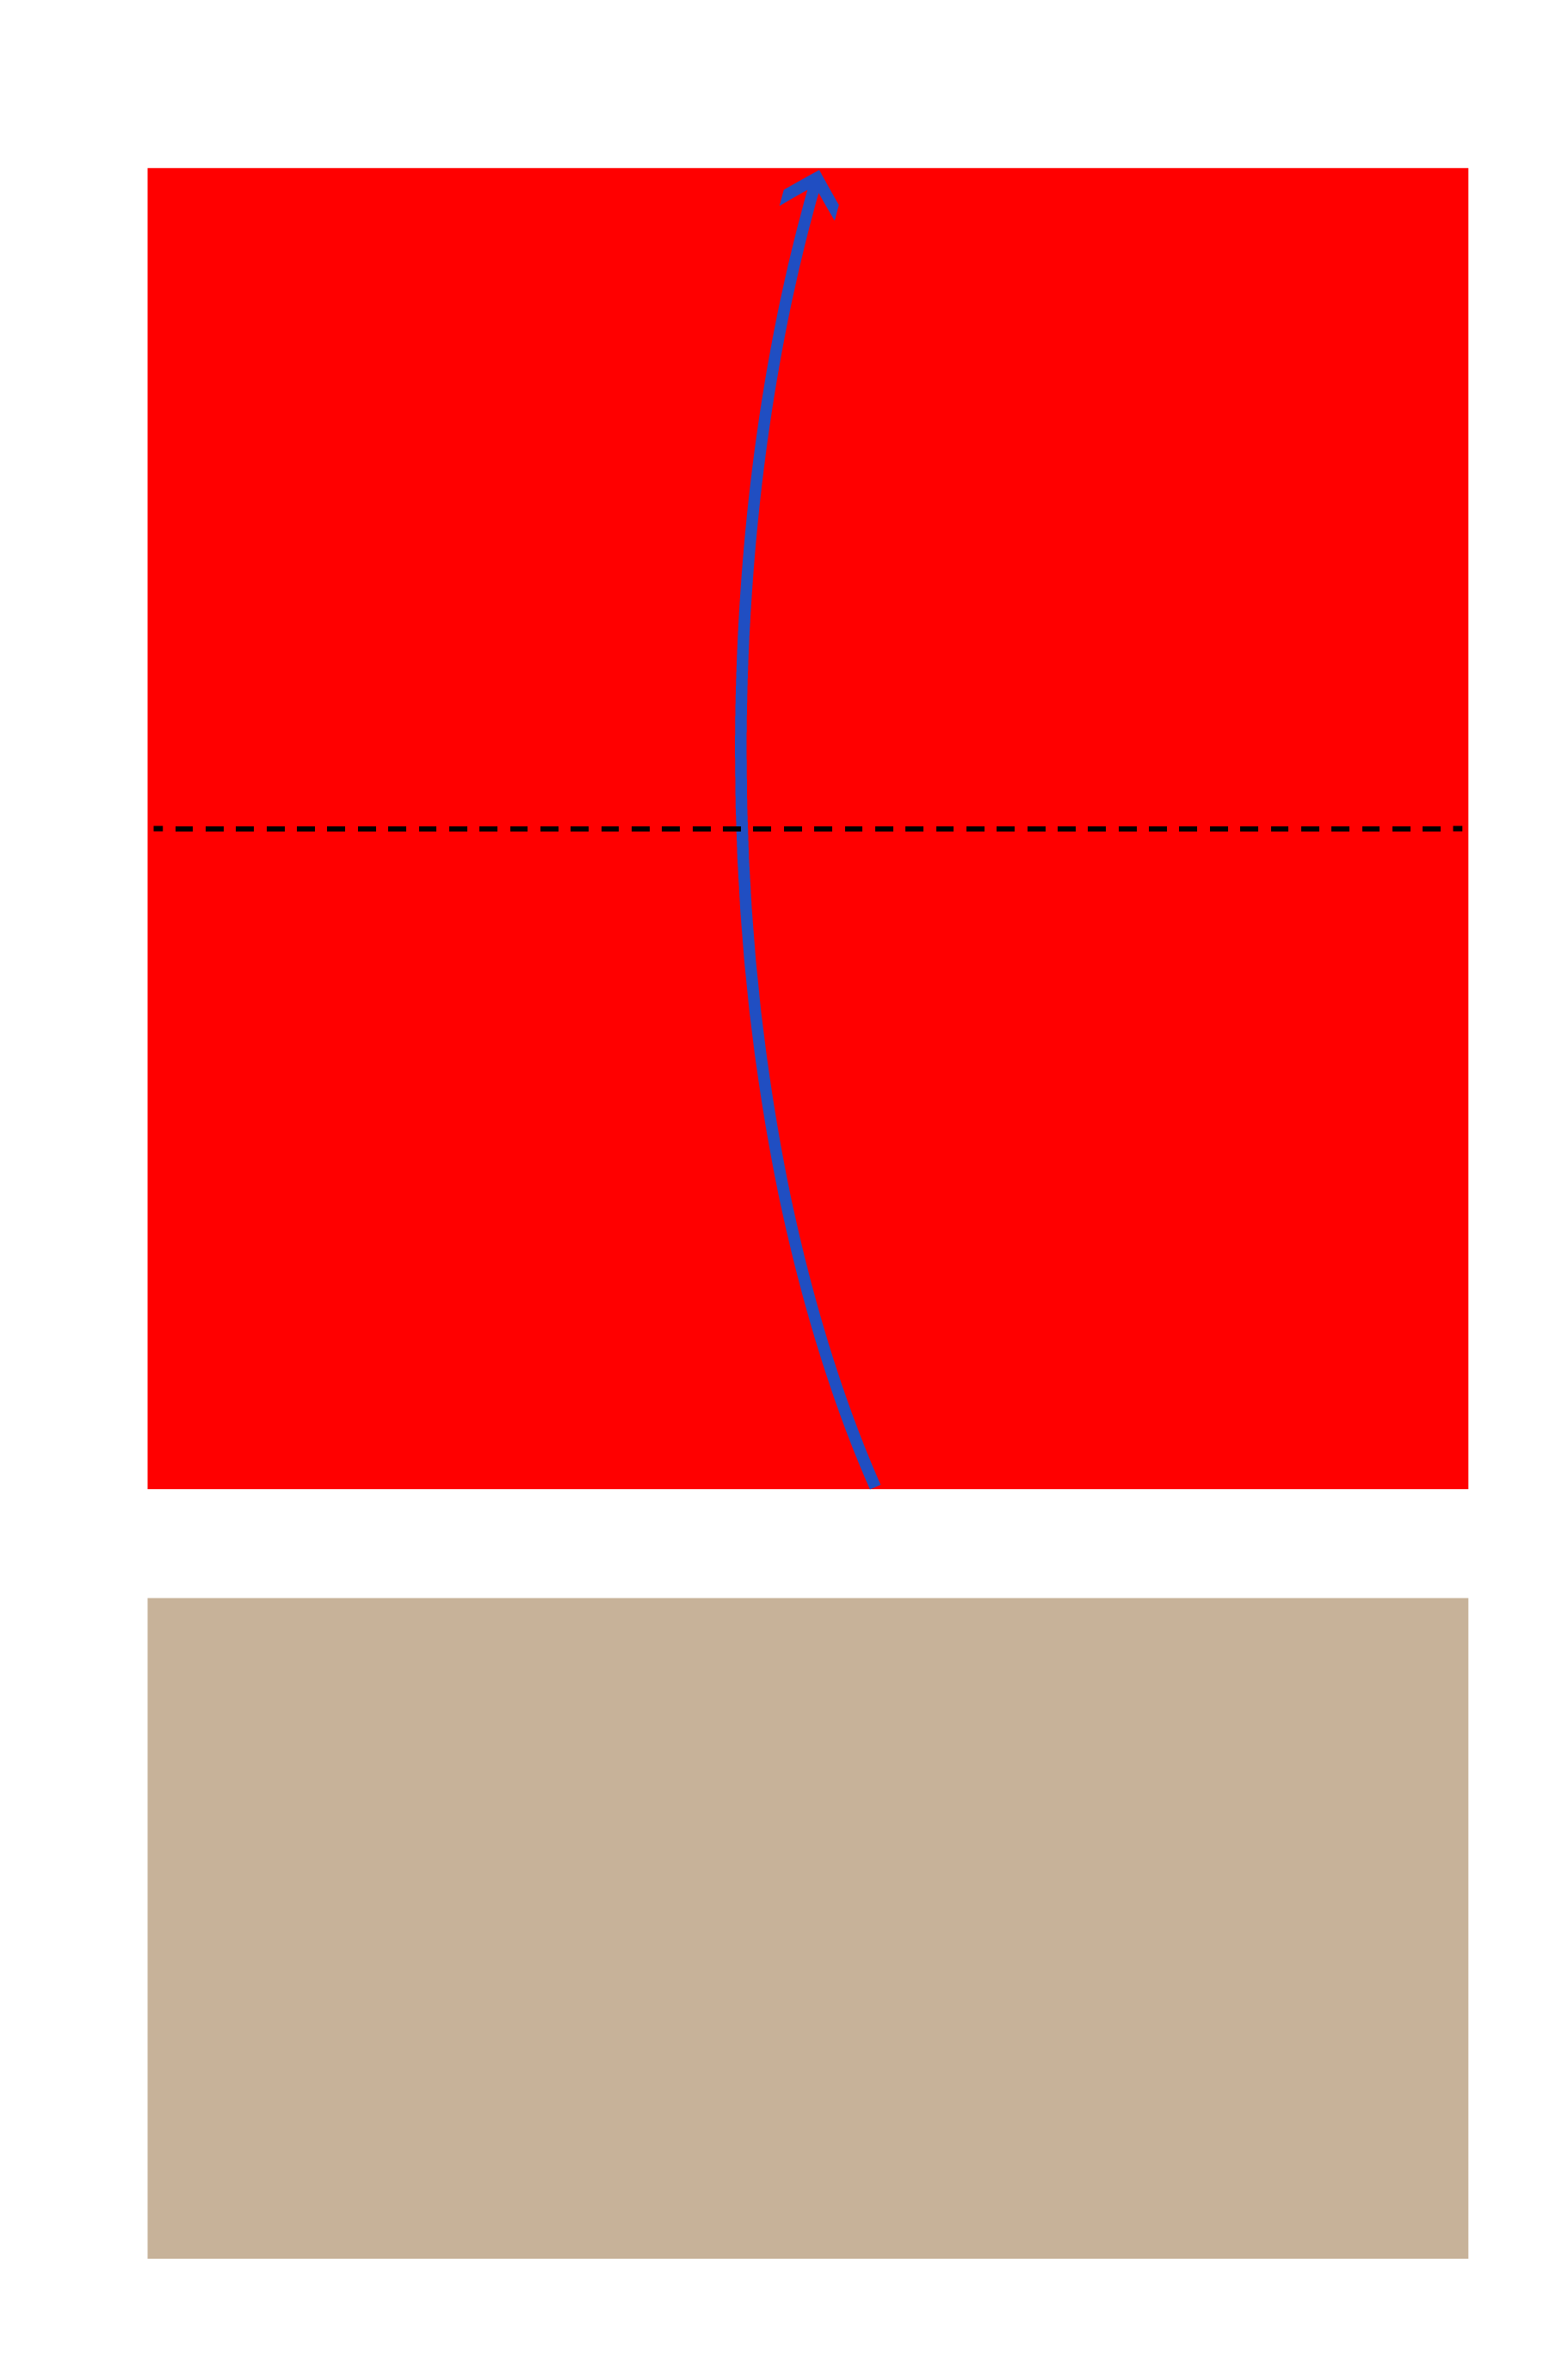
Step 1
Before start ensuring the paper is cut into a proper square balanced shape. Place the square origami paper with the coloured side up. Fold it into half so that the bottom edge meets the top edge, then unfold it.
Step 2
Fold the left edge to the right edge, then unfold.
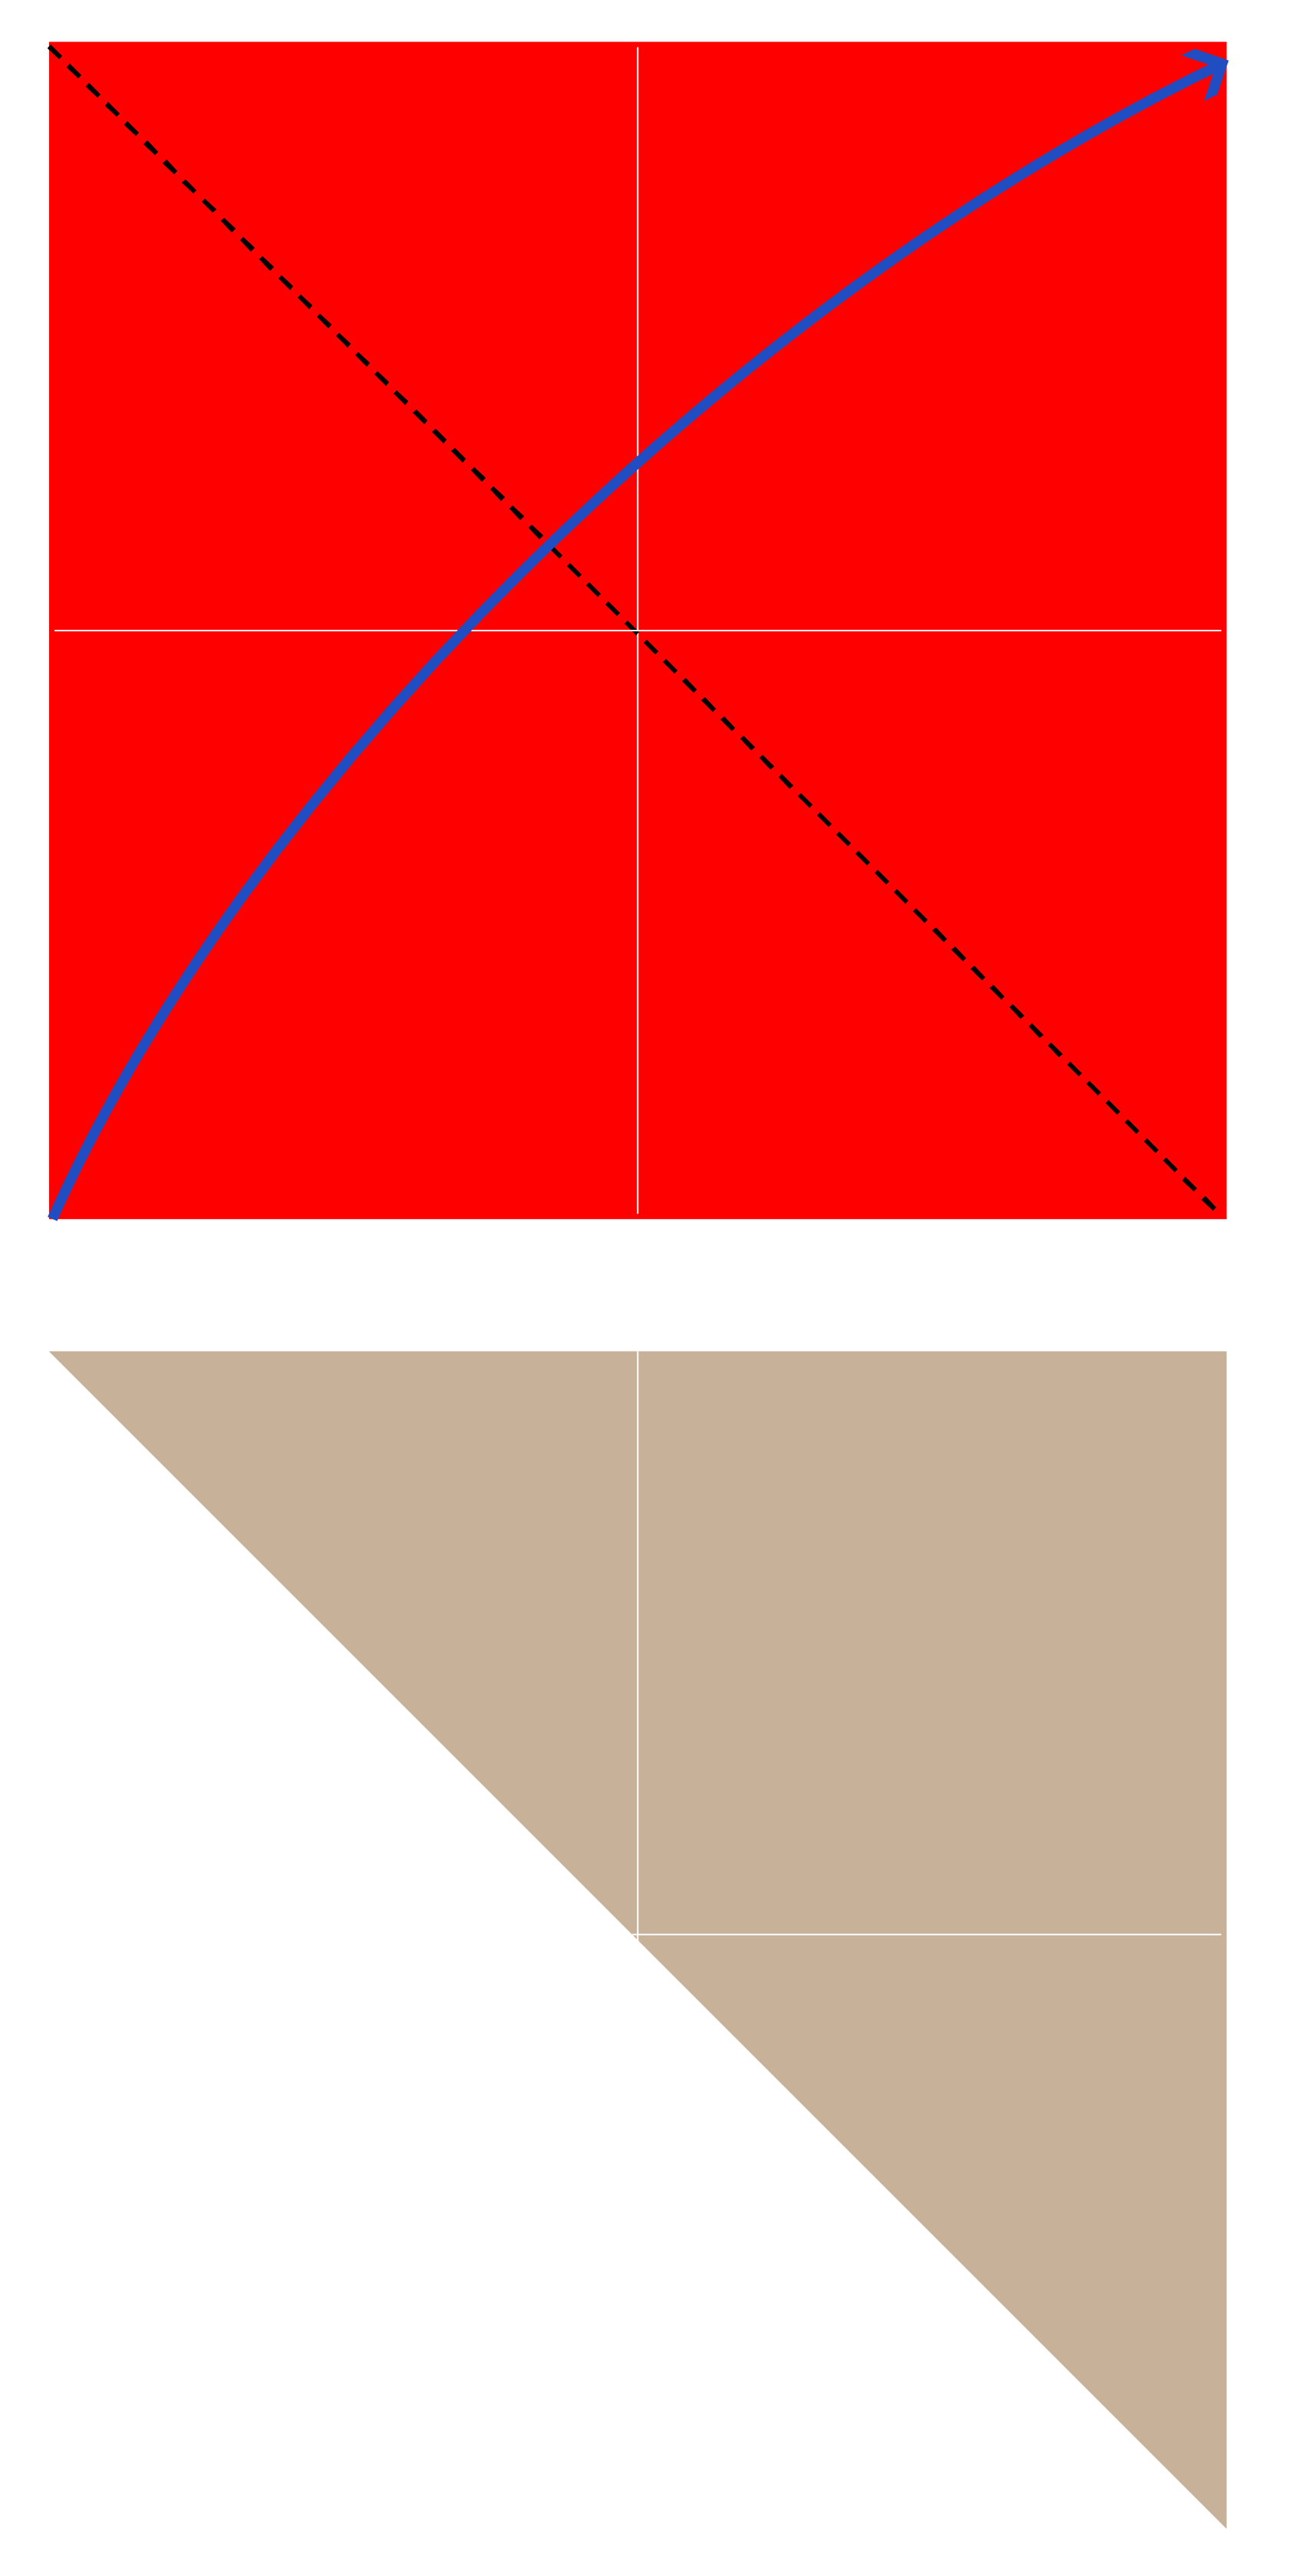
Step 3
Fold the paper diagonally to form a triangle, then unfold.
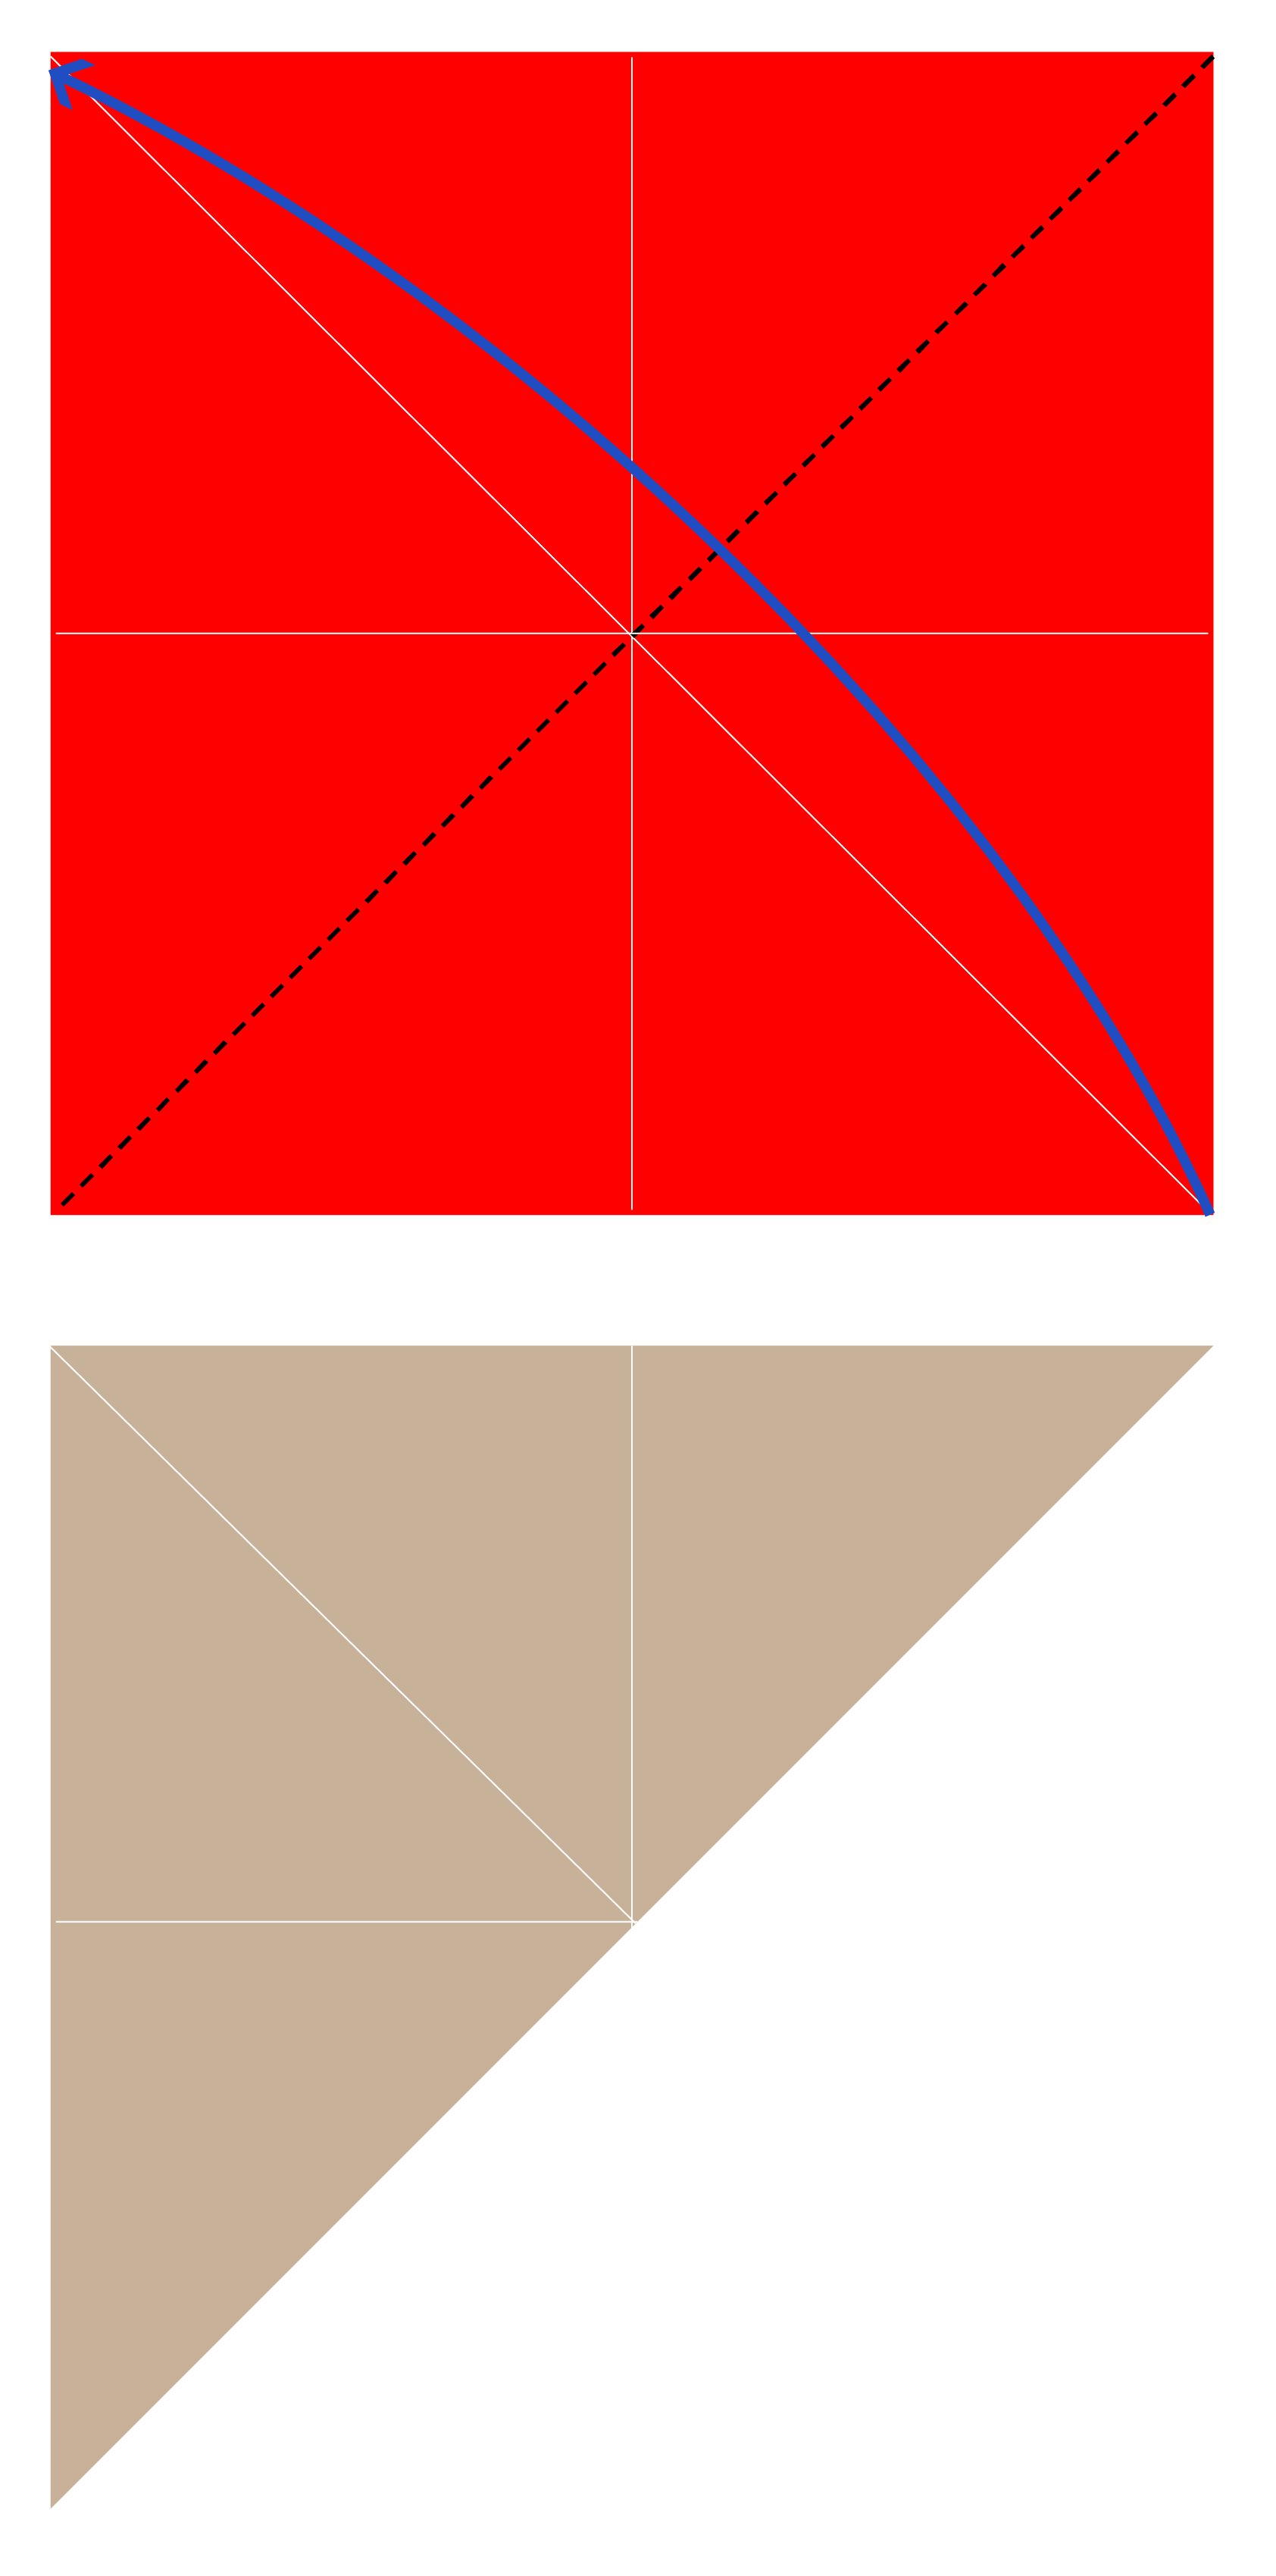
Step 4
Repeat Step 3 for the second diagonal.
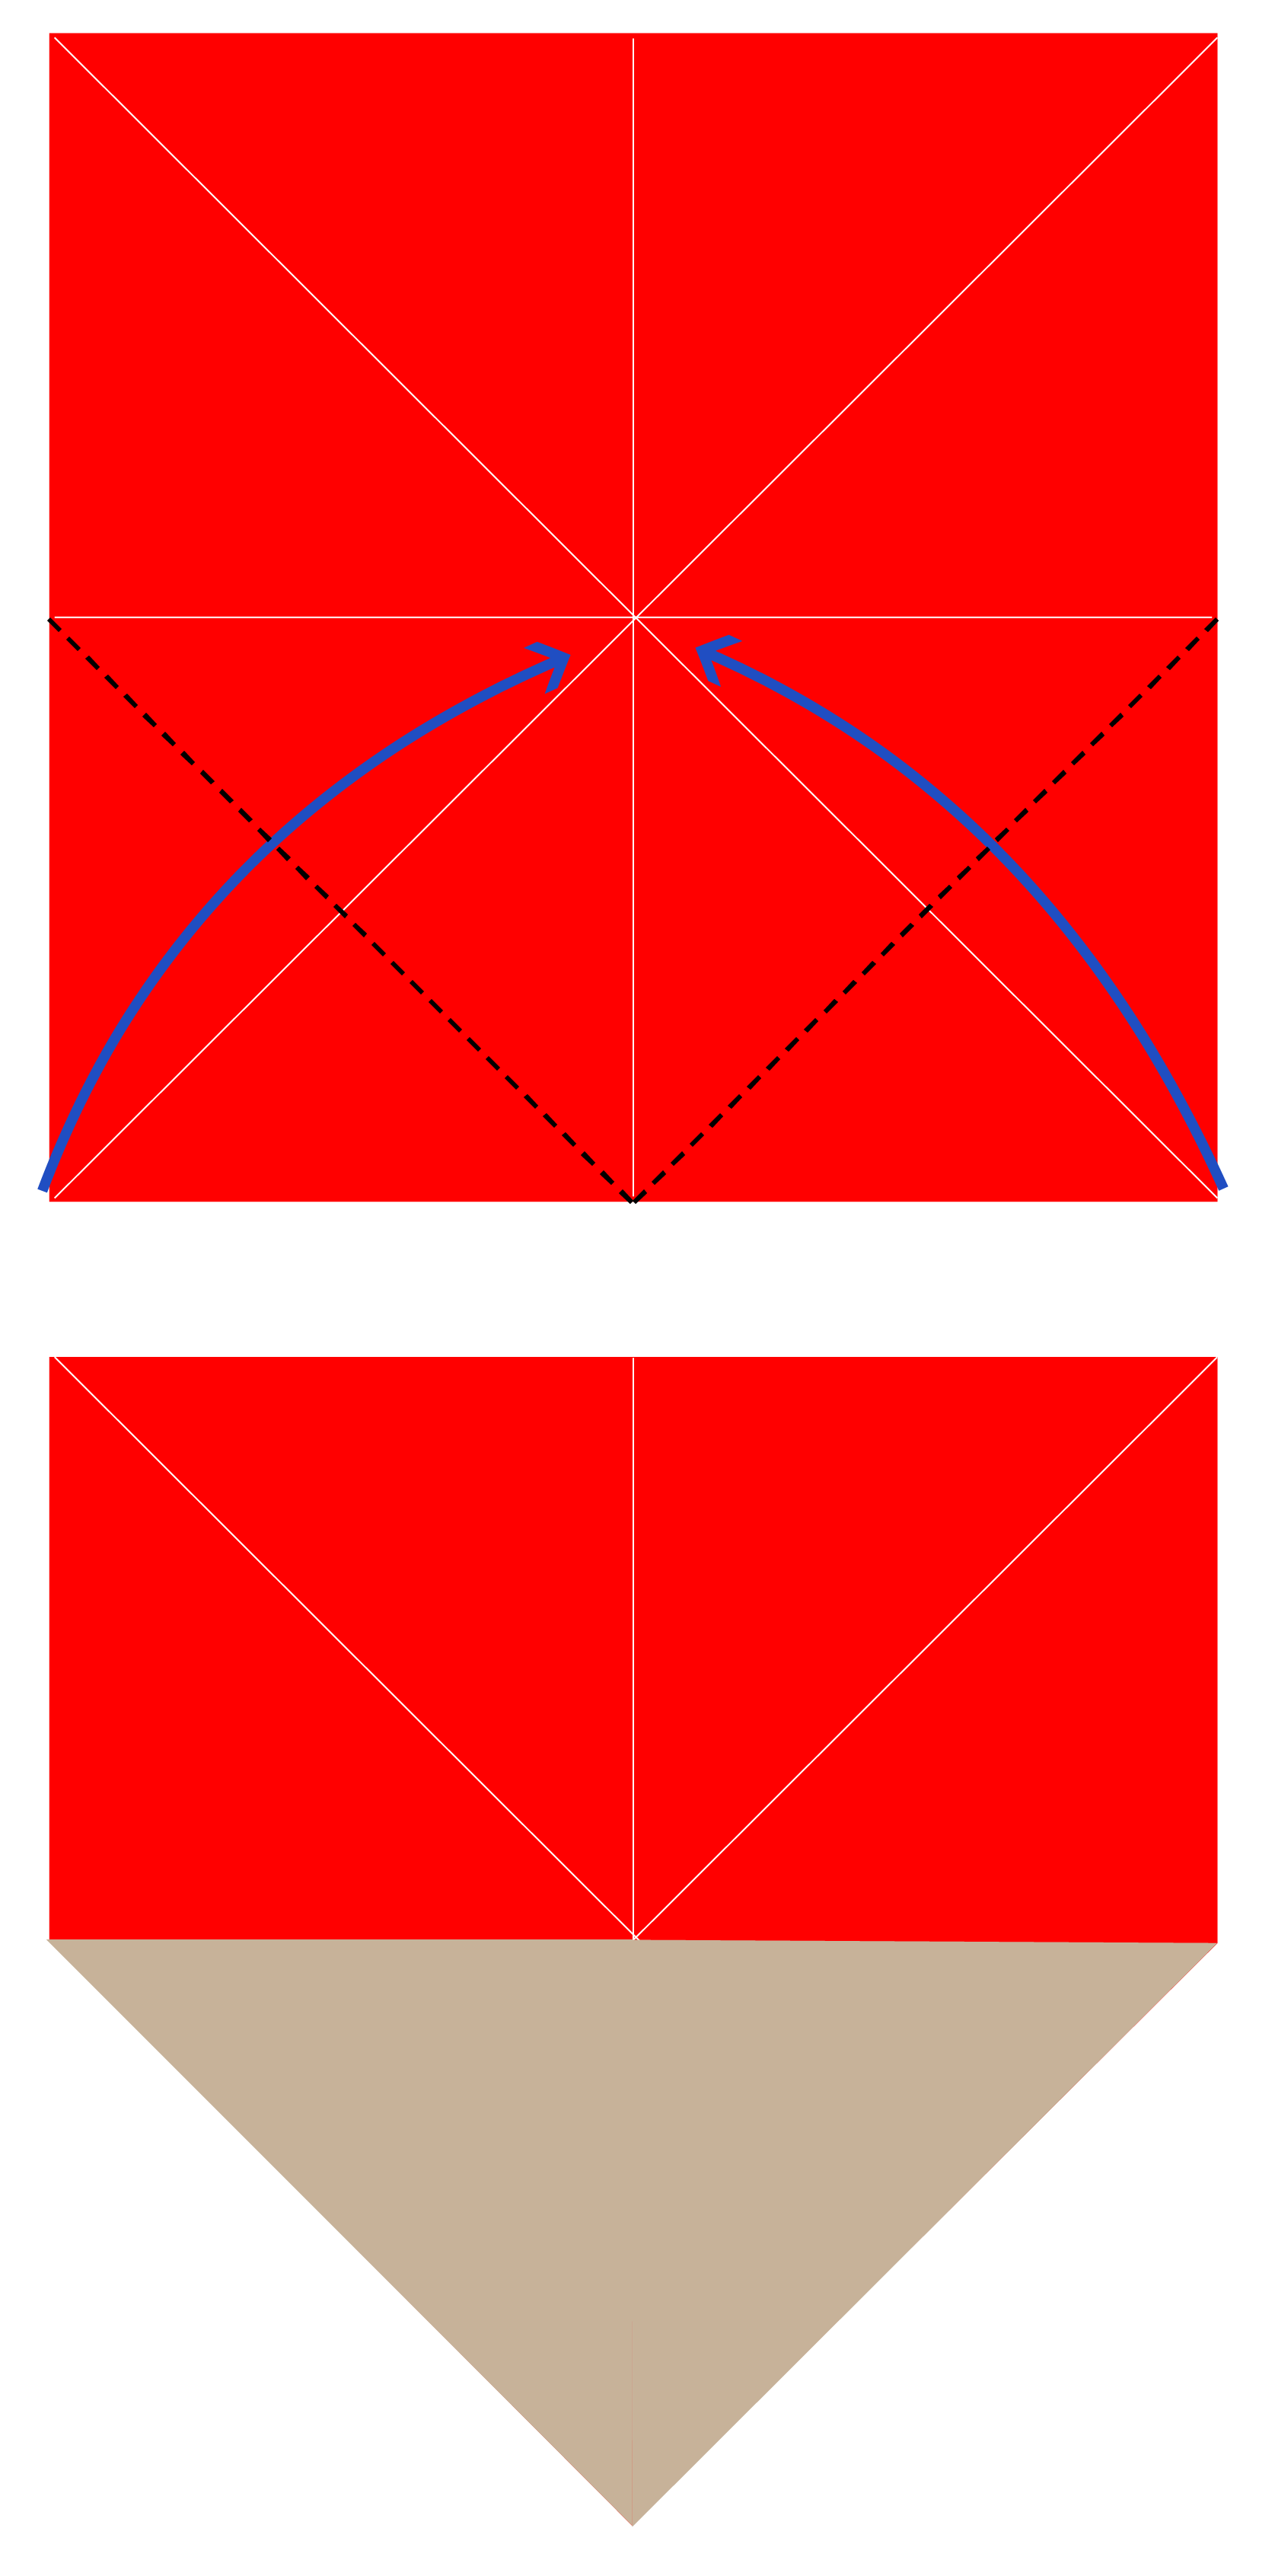
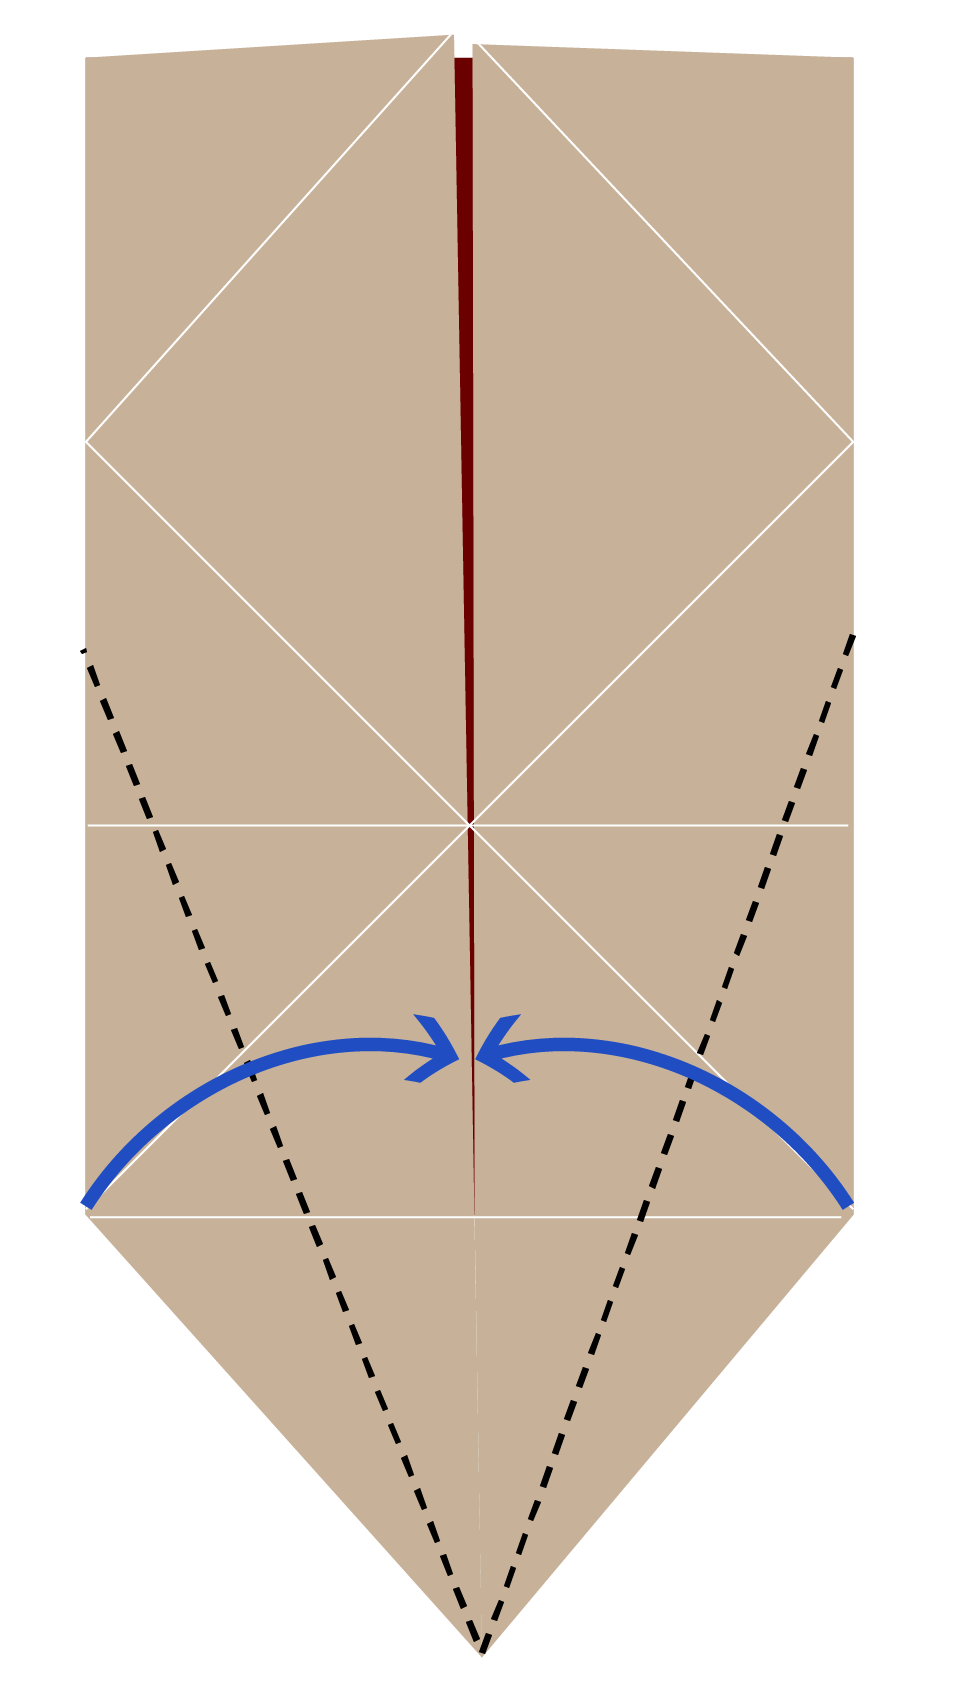
Step 5
Fold both of the bottom left and right corners to the centre point, then unfold.
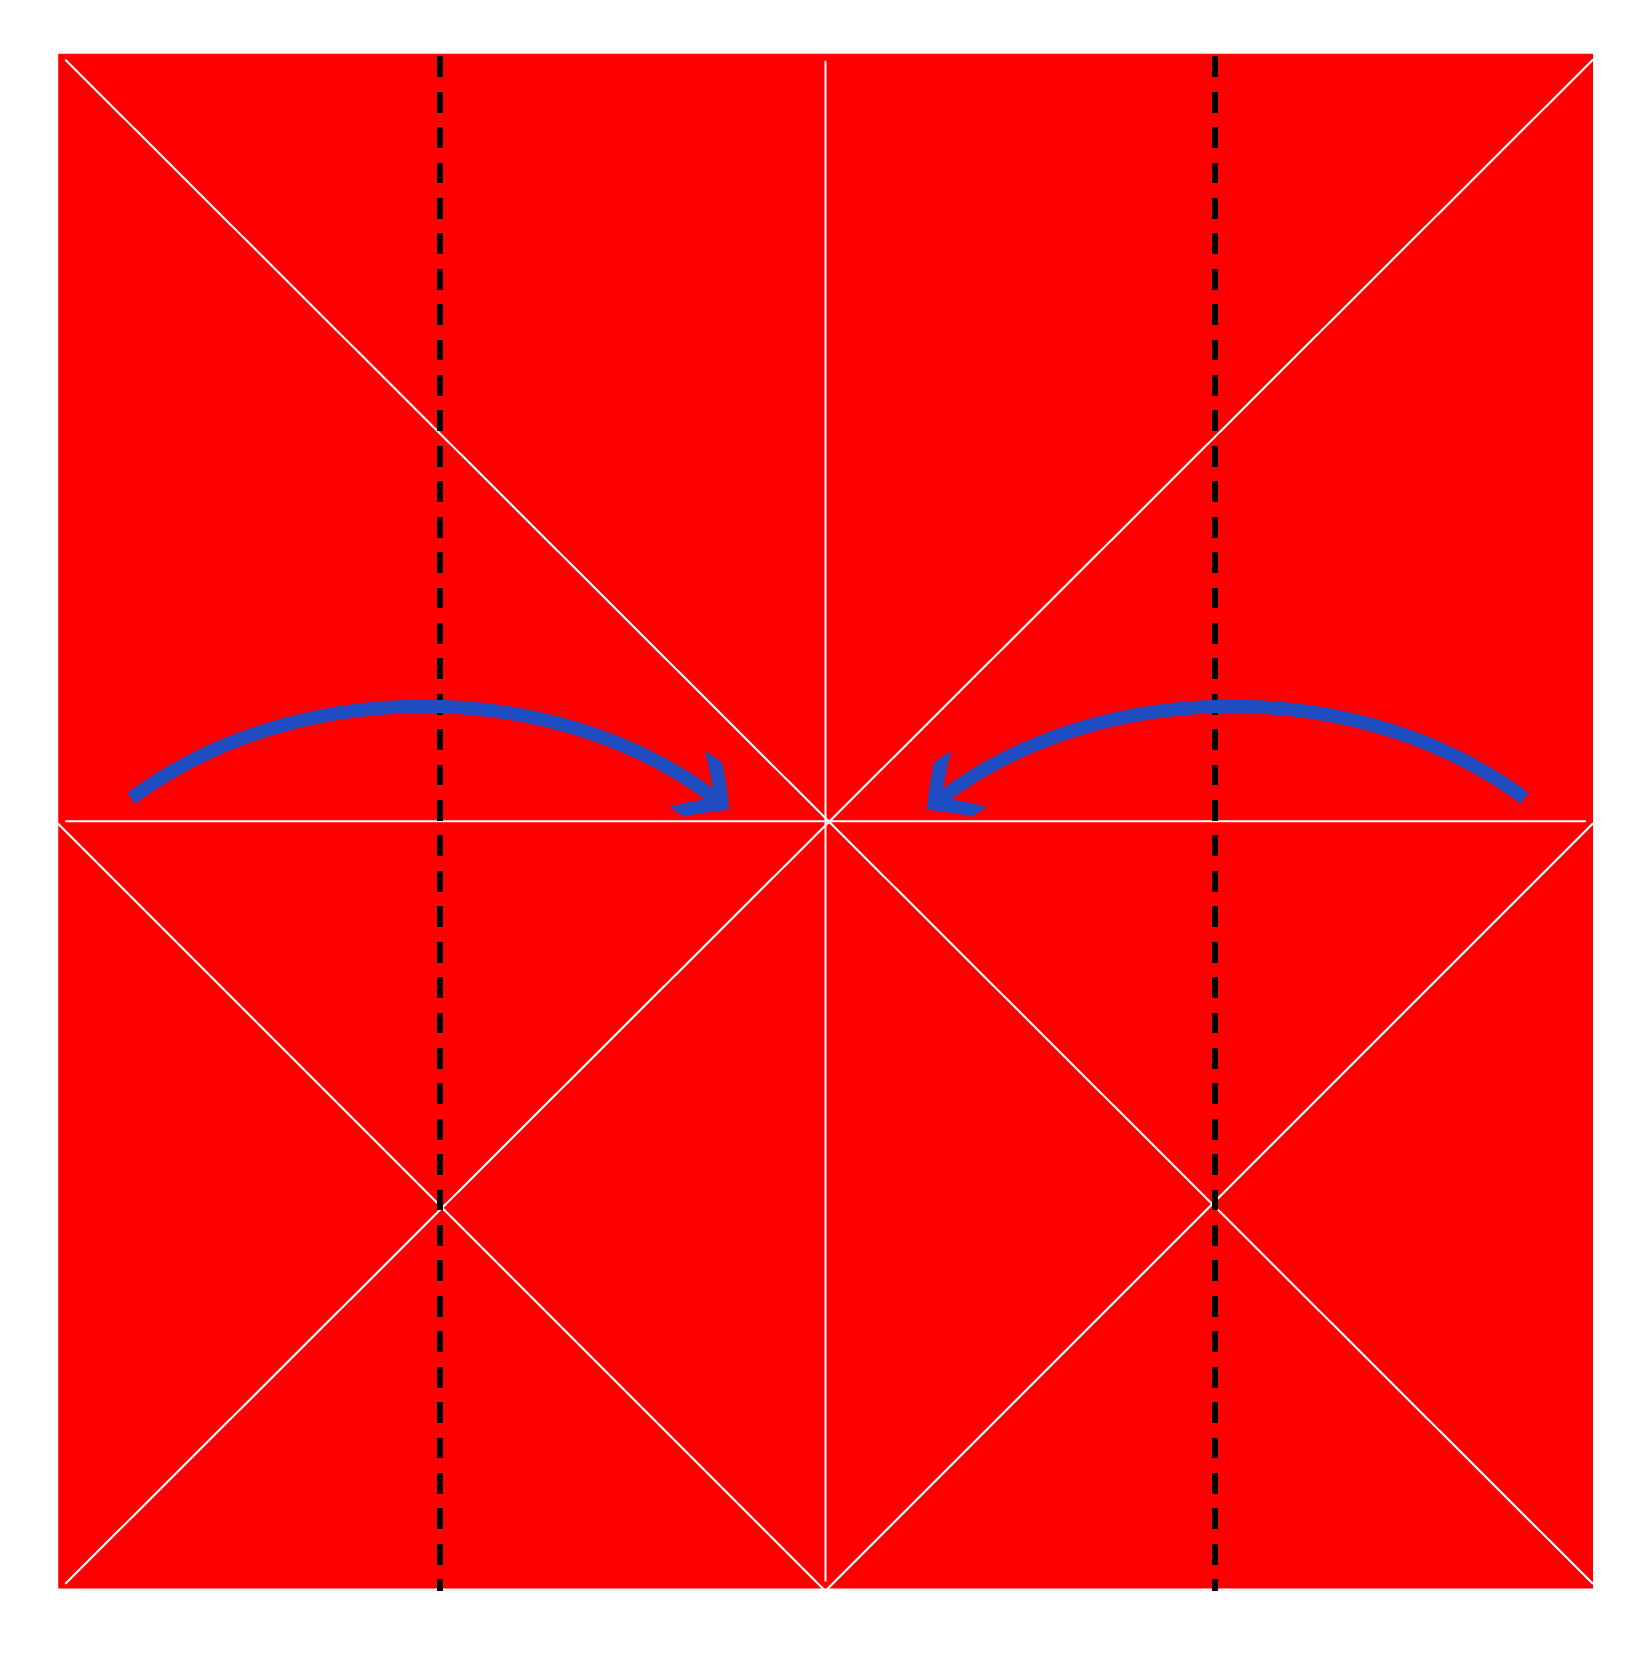
Step 6
Fold both left and right edges to meet at the centre line.
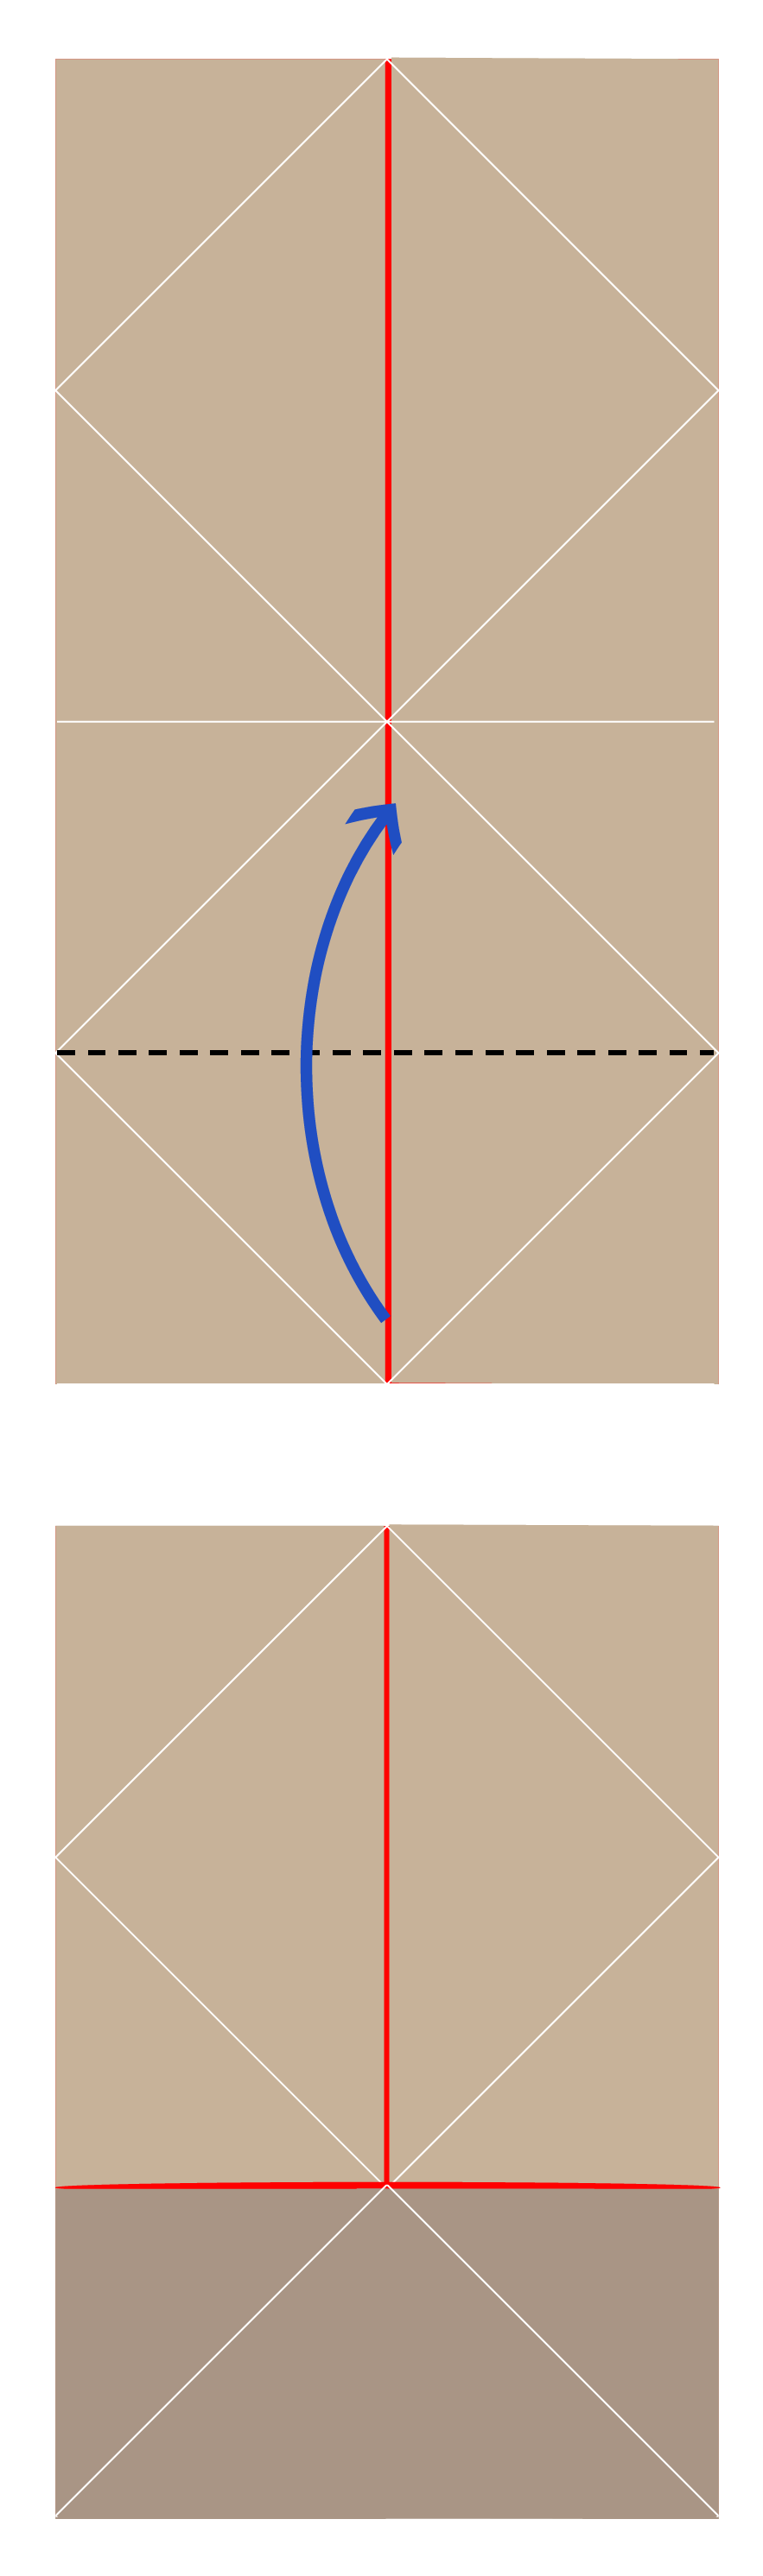
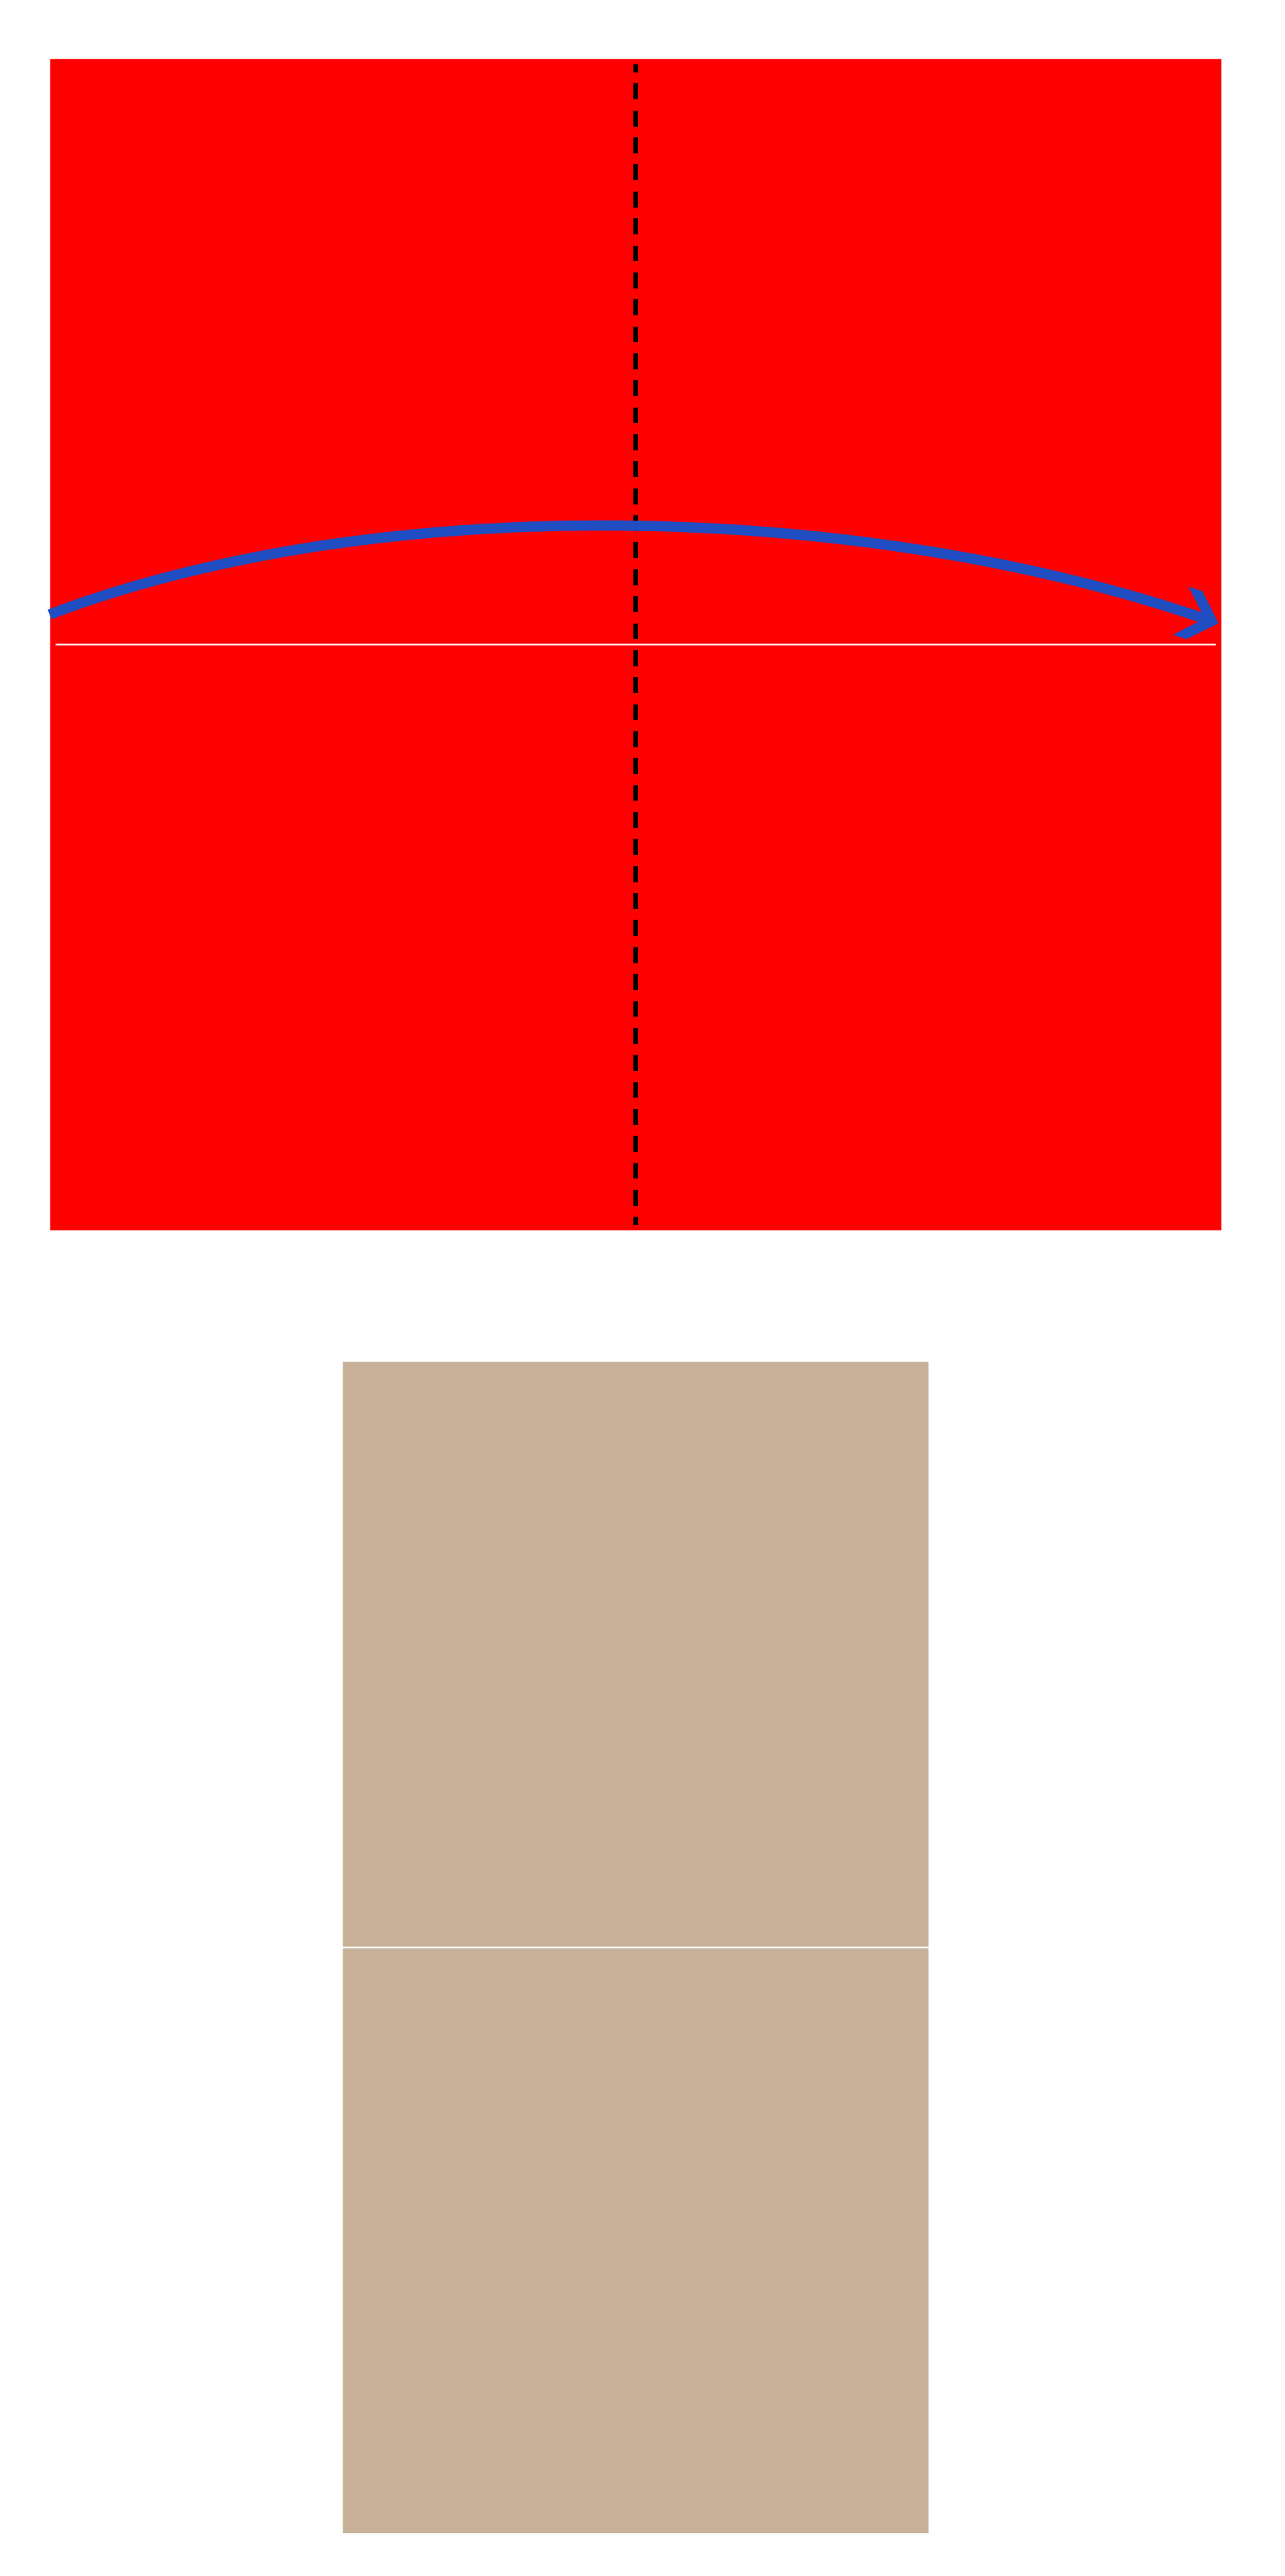
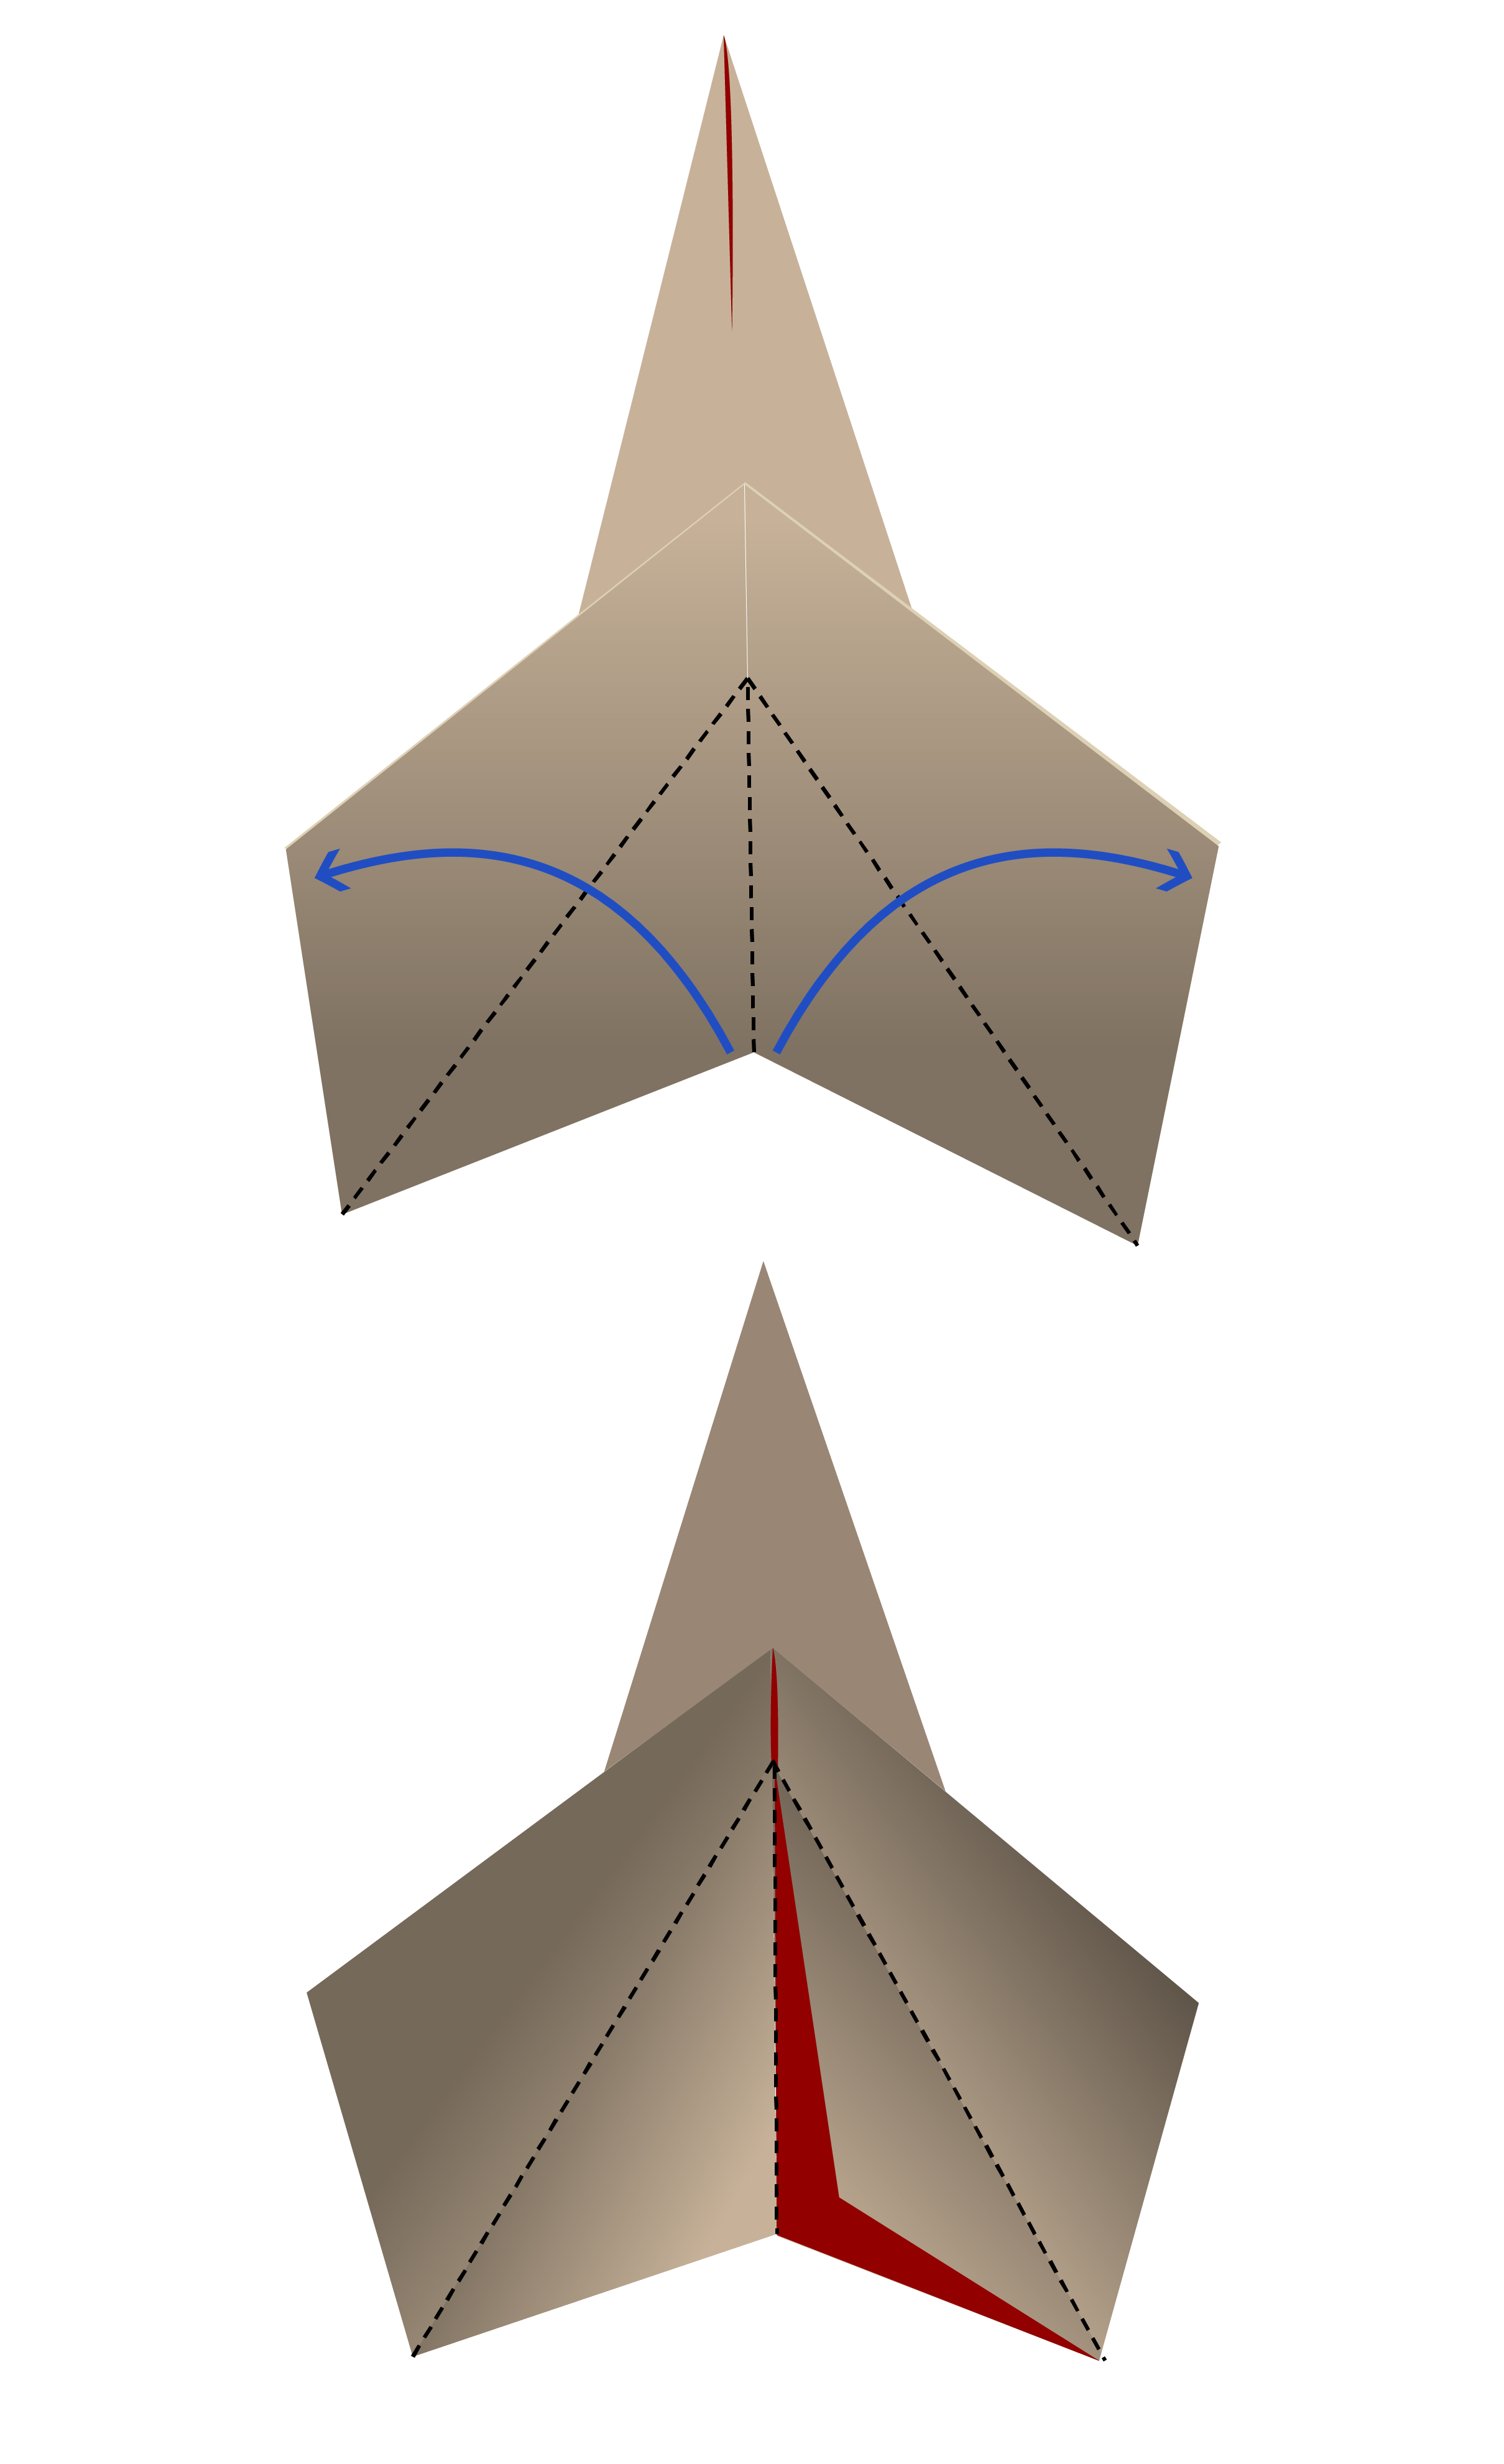
Step 7
Fold the bottom edge to the centre line, then unfold, to create creasing lines.
Step 8
Fold the bottom edge to the centre line again, but this time, open up the layers so that the corners meet at the centre point, then flatten.
Step 9
Repeat Step 8 for the right side. Now you have a flat square-shaped bottom.
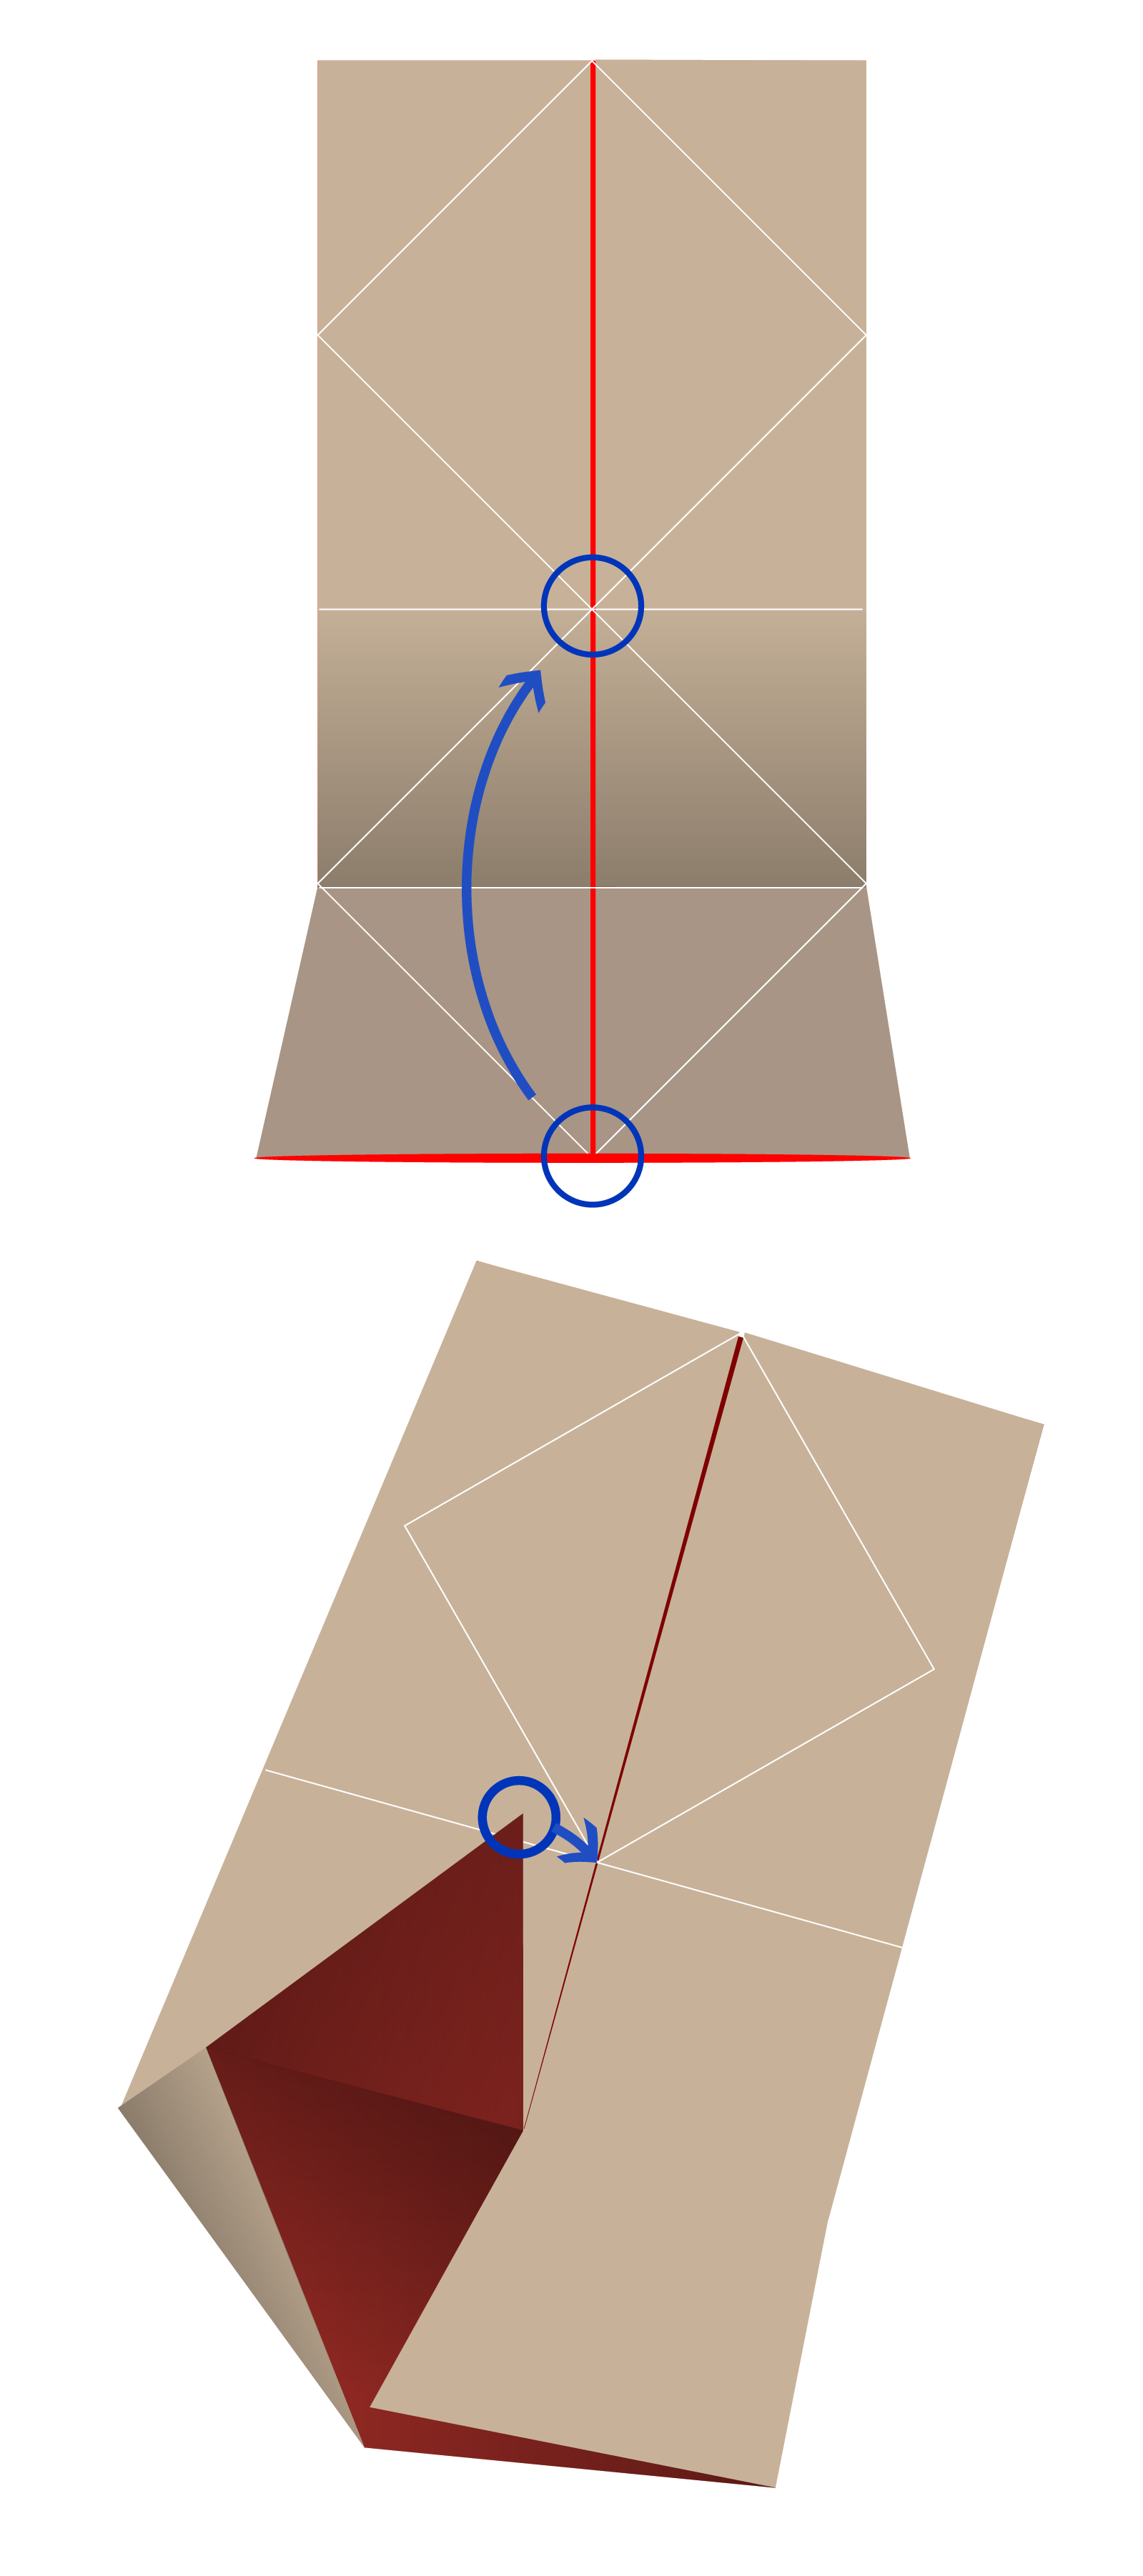
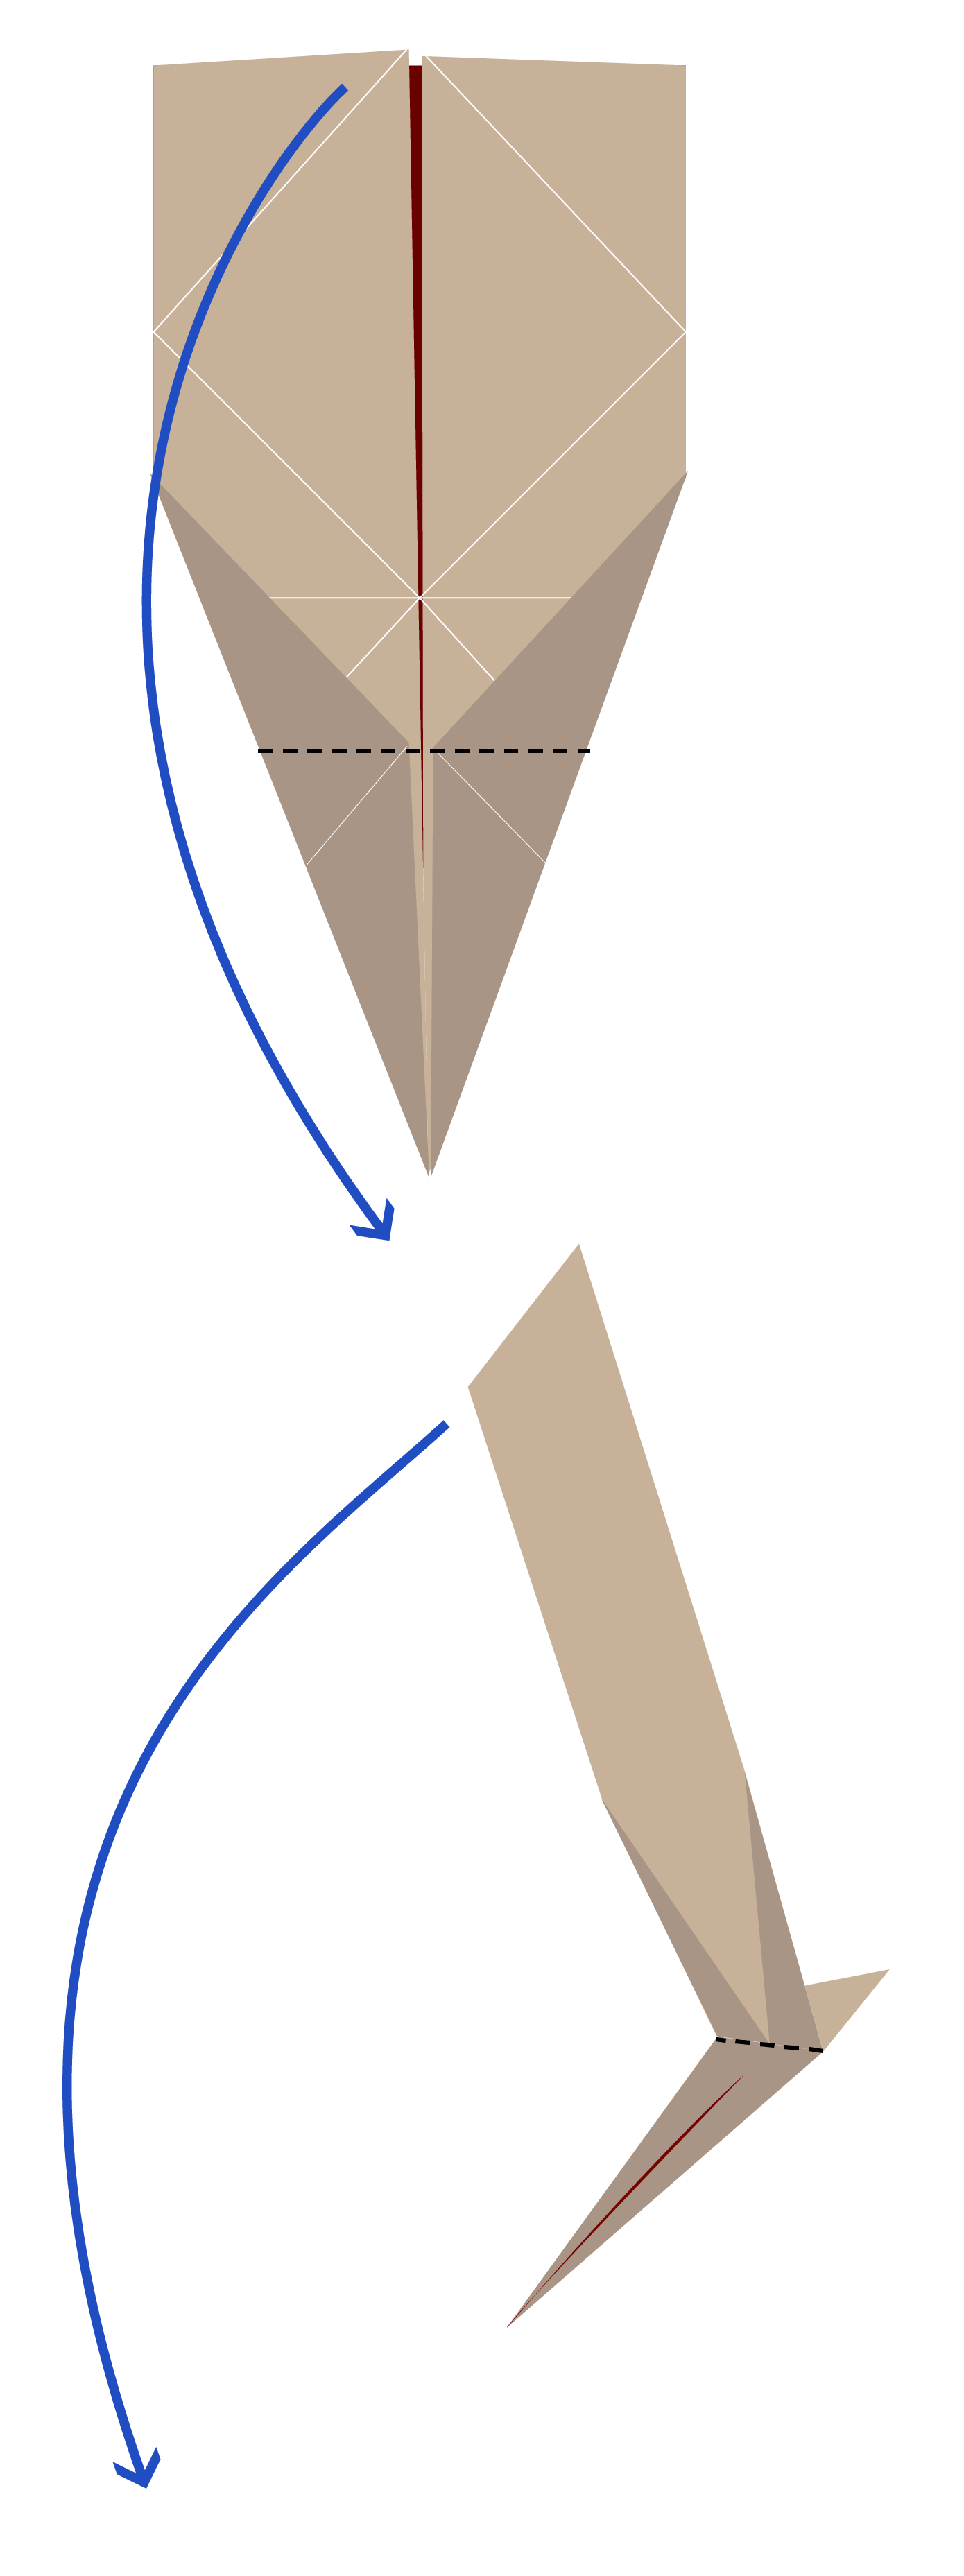
Step 10
Fold the square bottom backwards as shown.
Step 11
Fold the bottom-left and bottom-right corners to meet at the centre line.
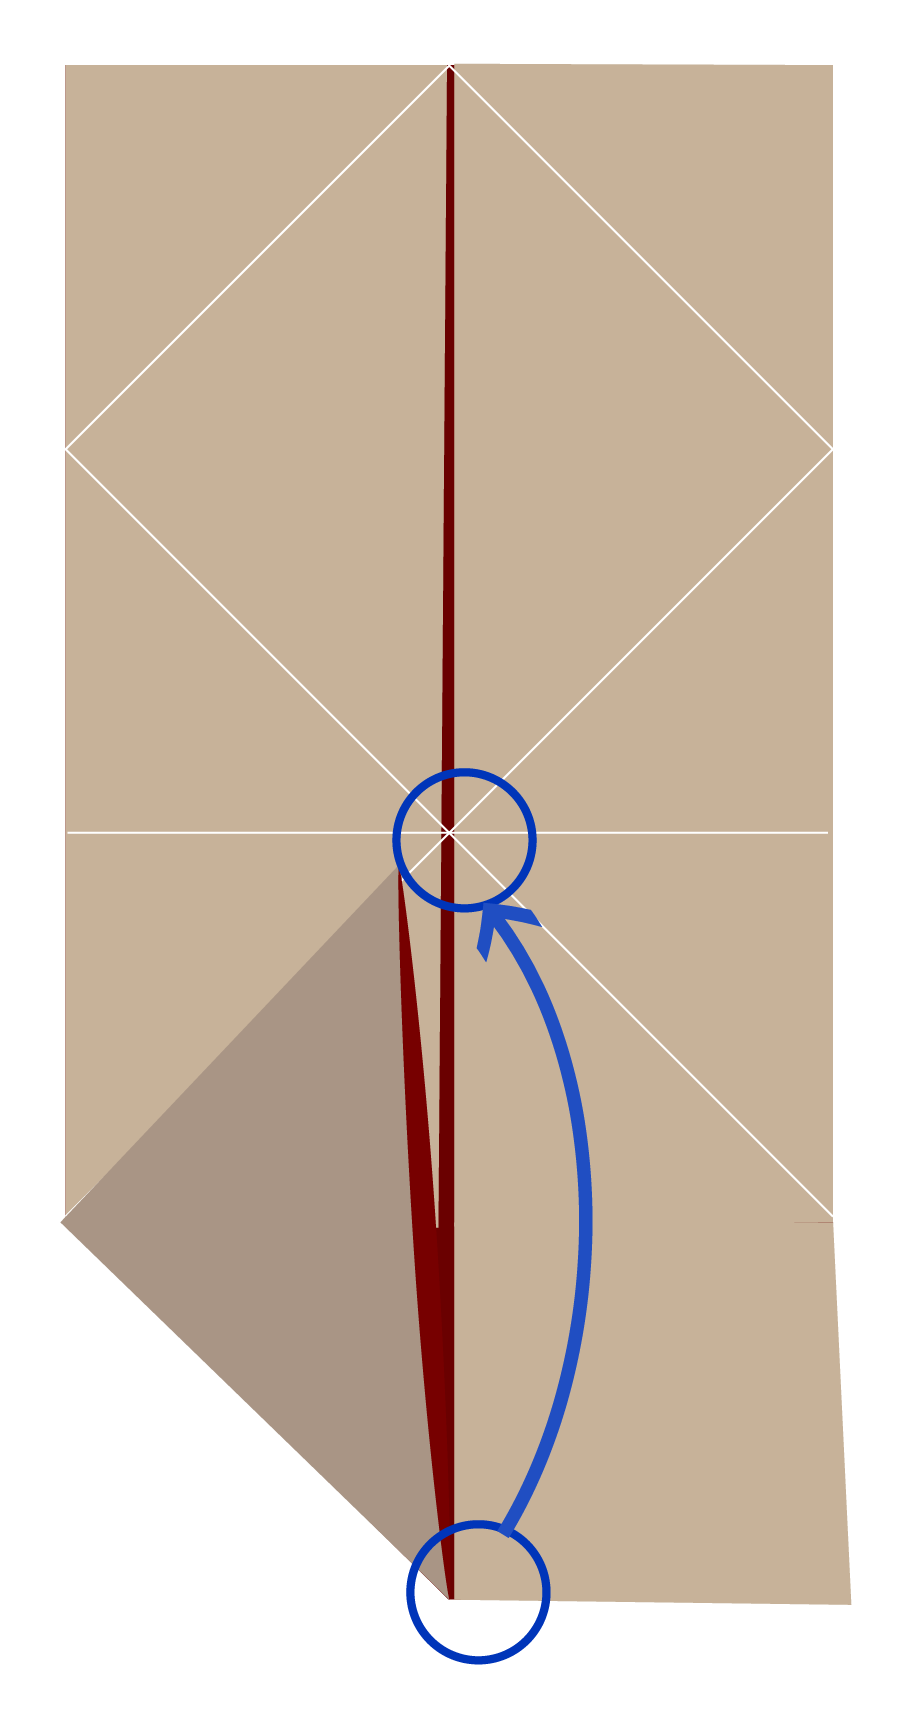
This may seem like a lot of steps, but stay with us here…our rabbit origami is halfway there!
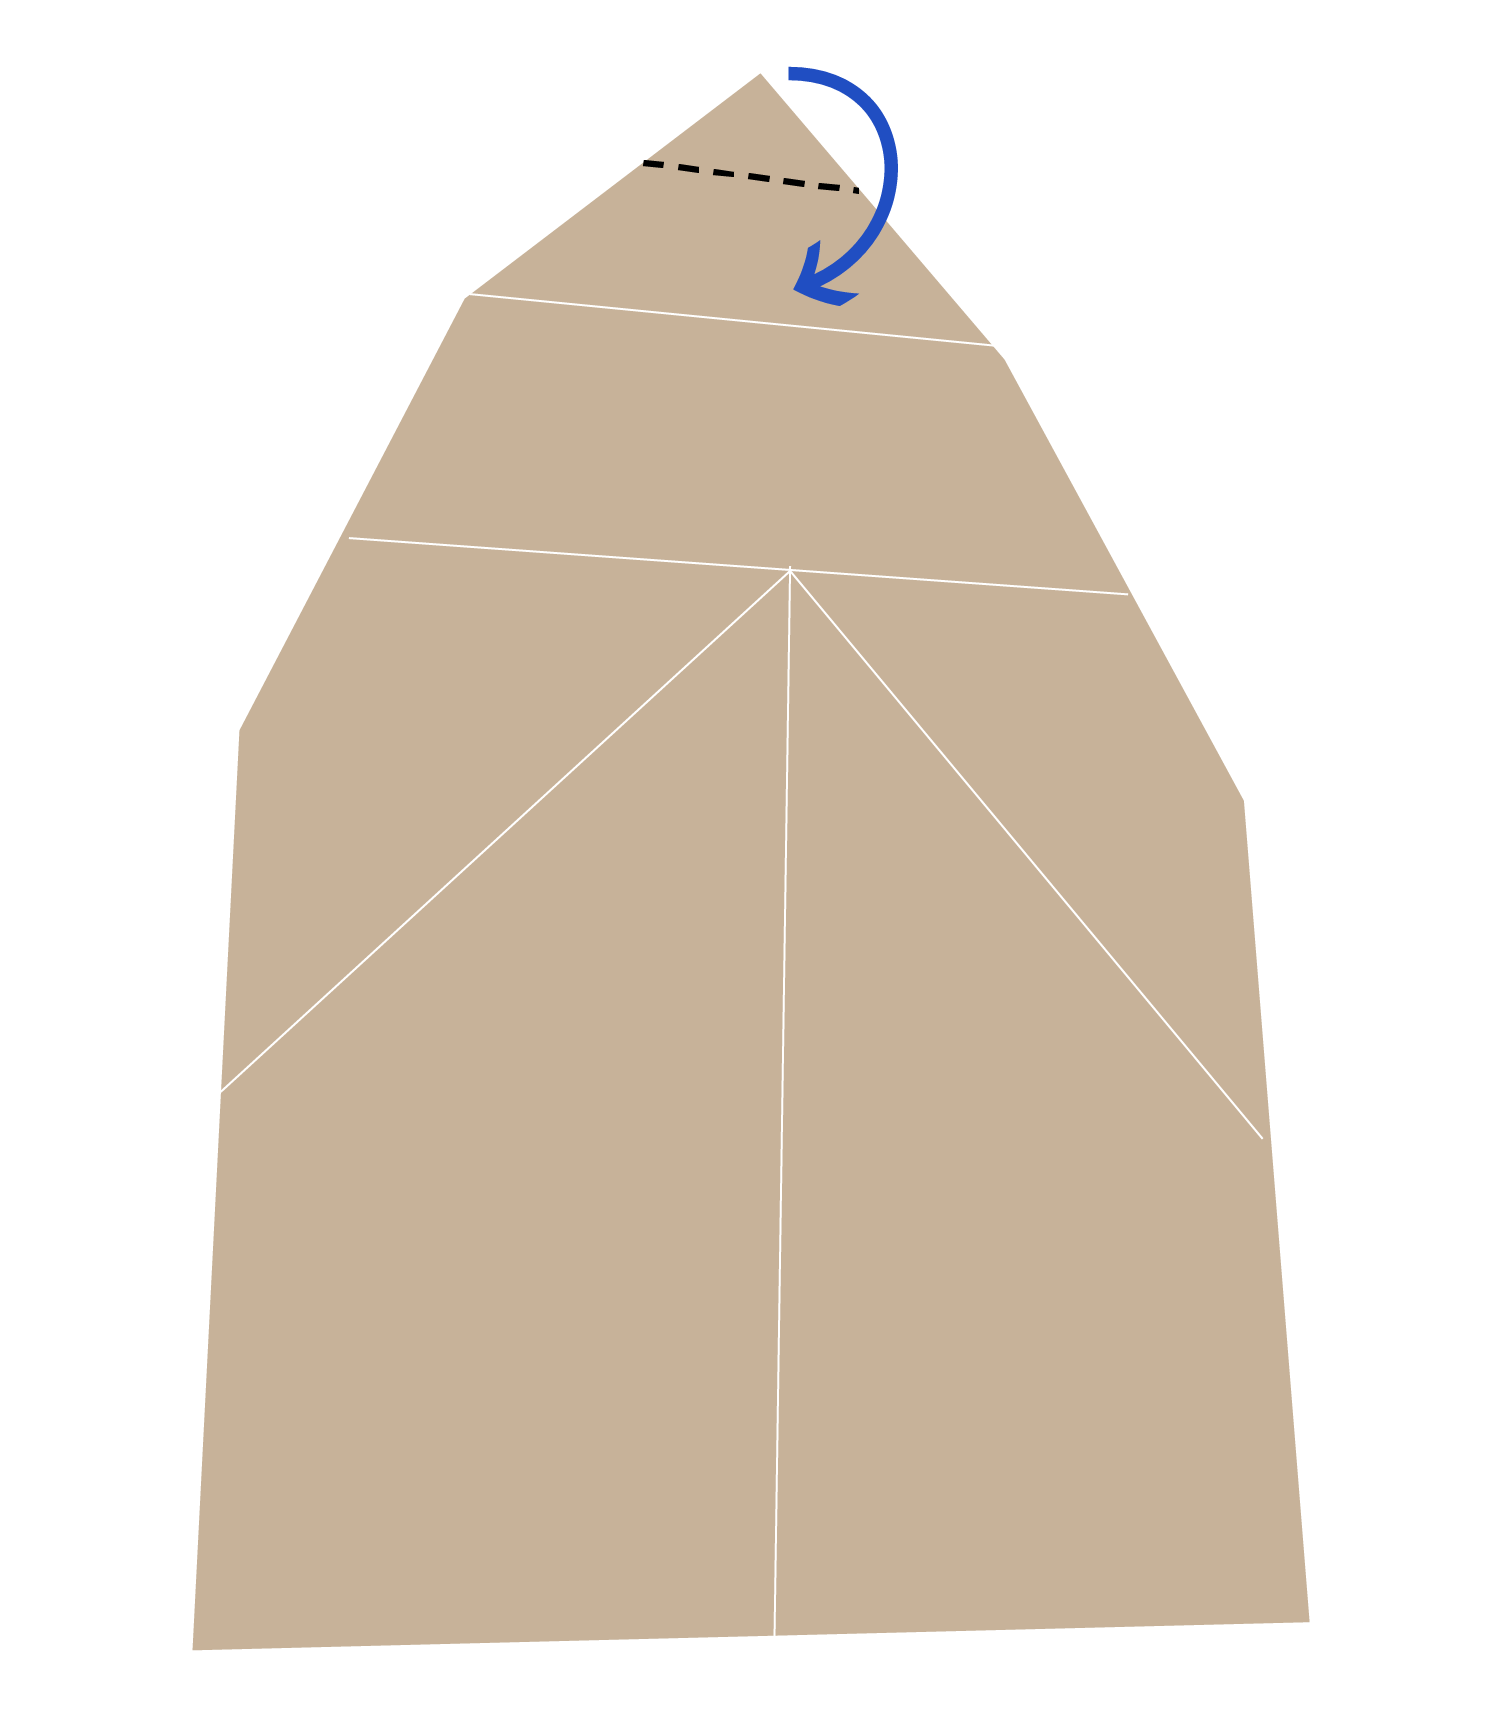
Step 12
Fold the top part down along the dotted line, as shown.
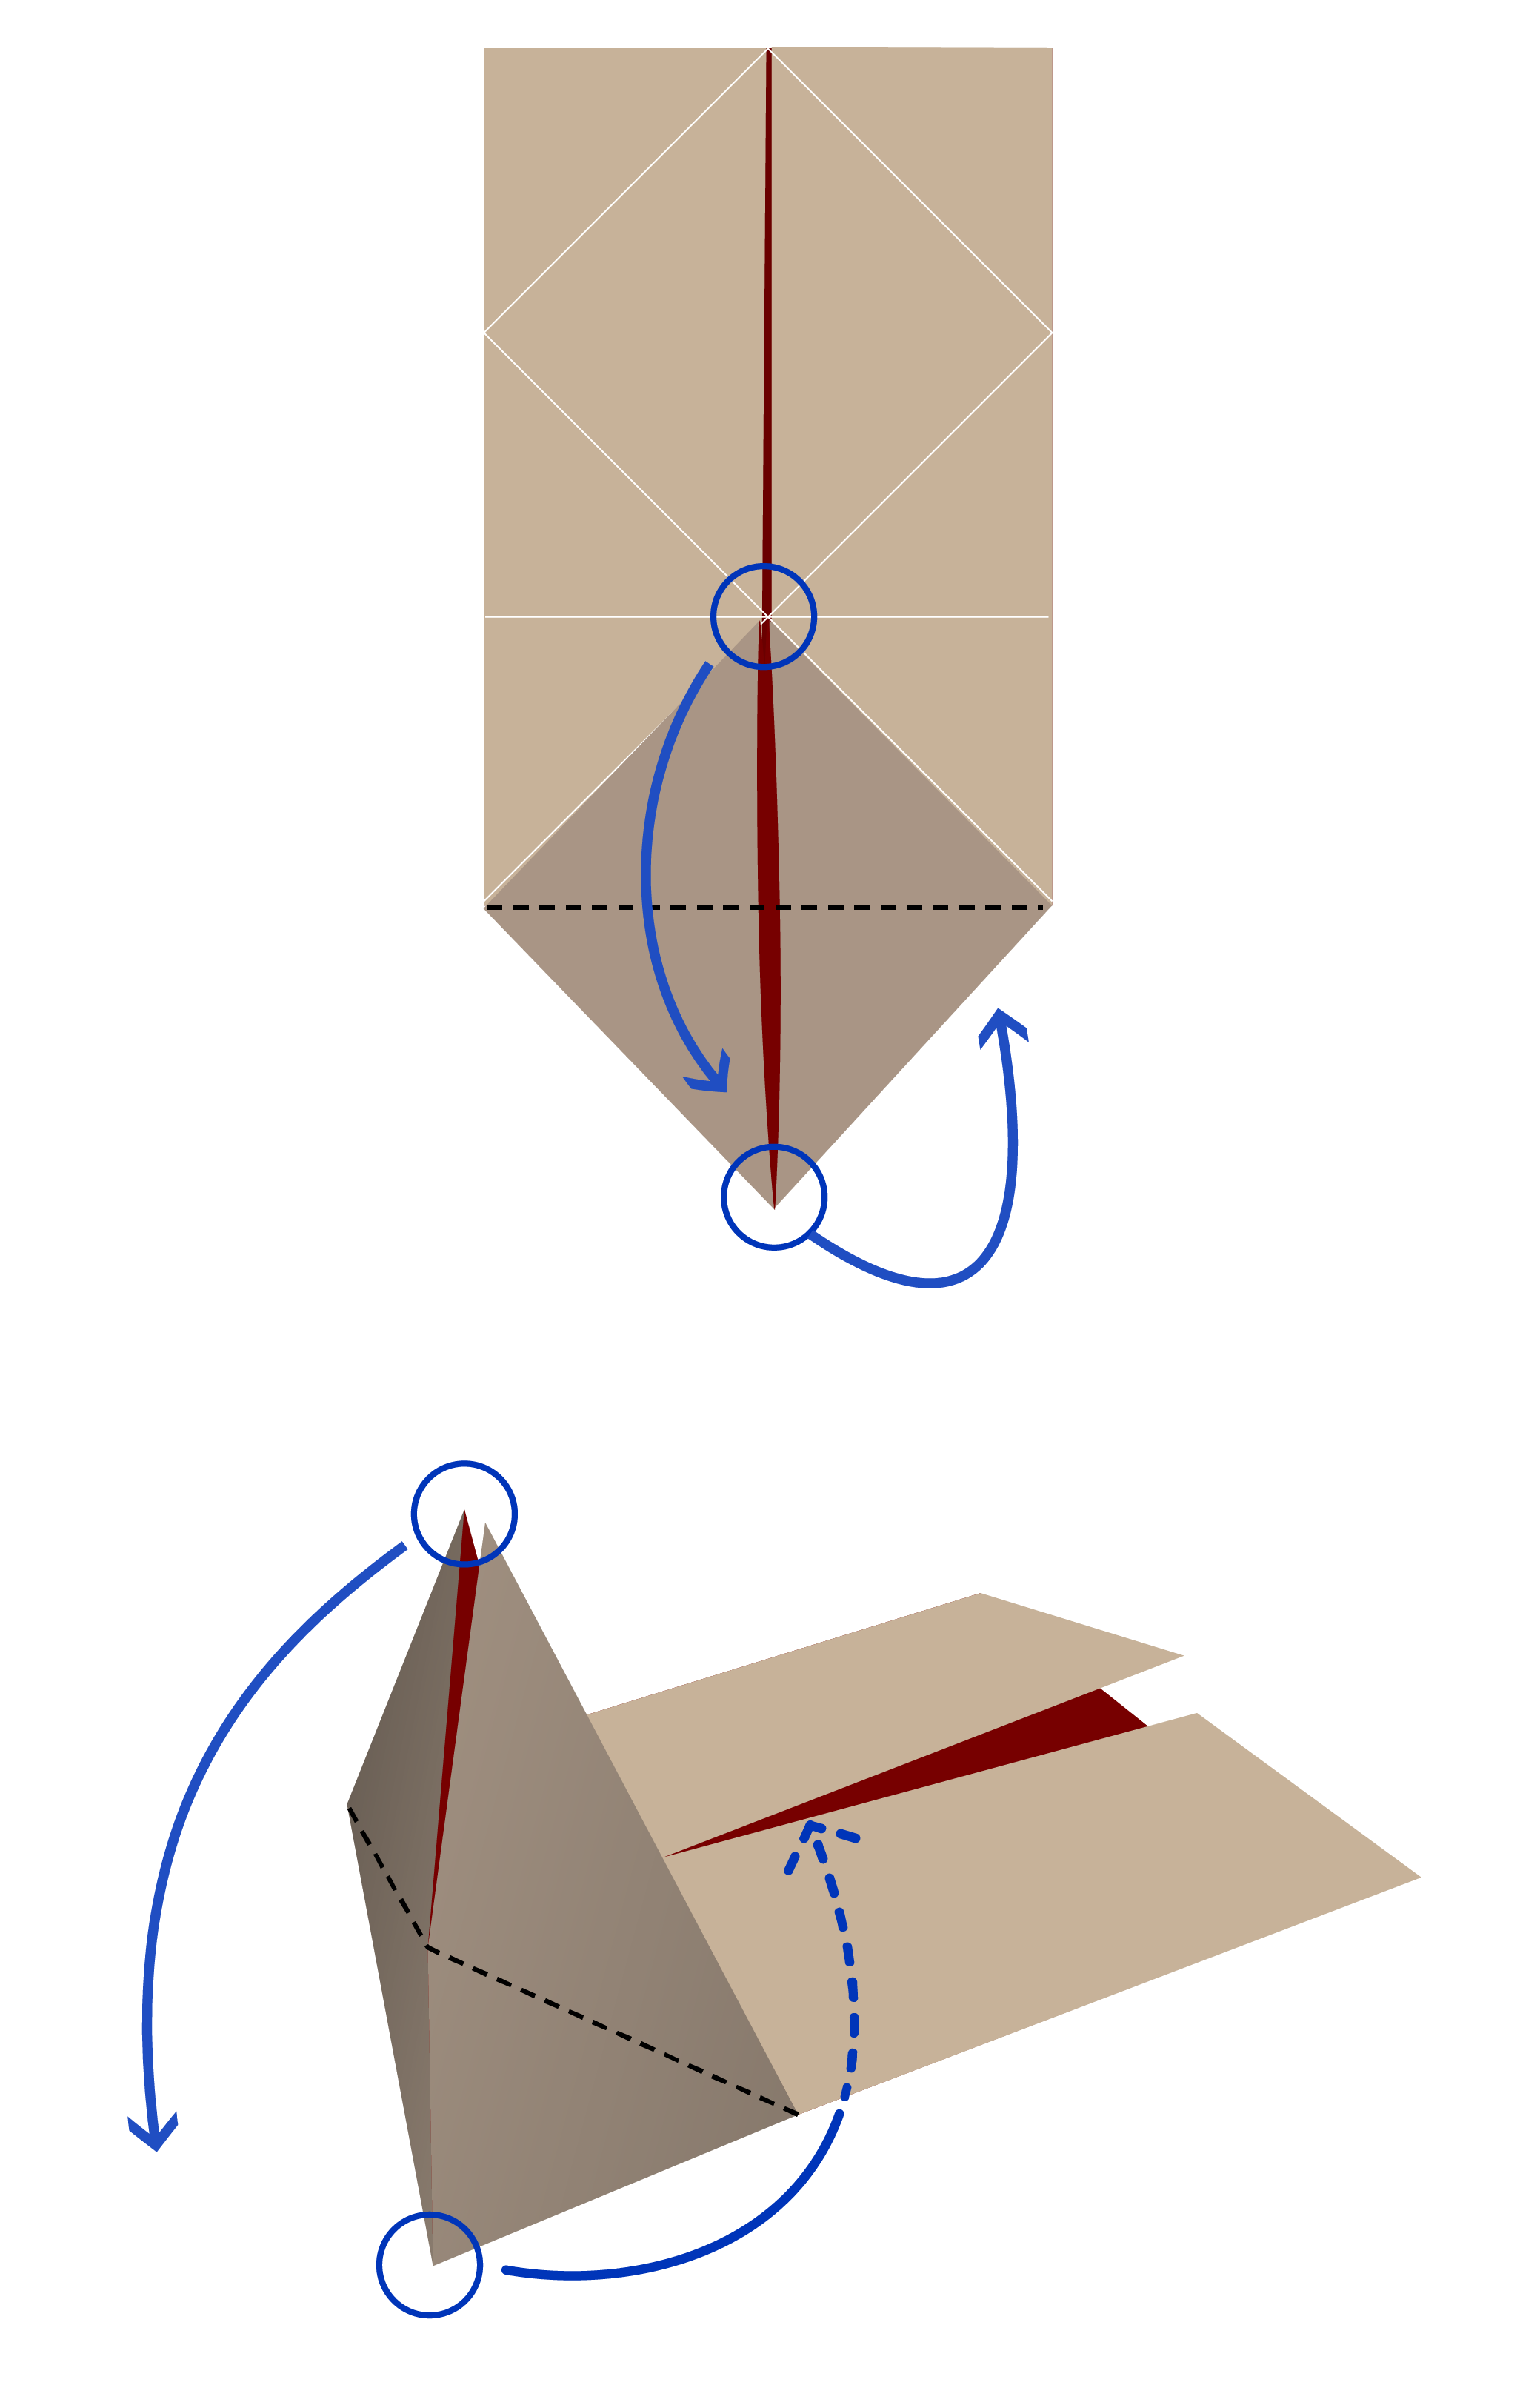
Step 13
Fold the top tip down along the dotted line.
Step 14
Fold the right edge to the left along the centre line.
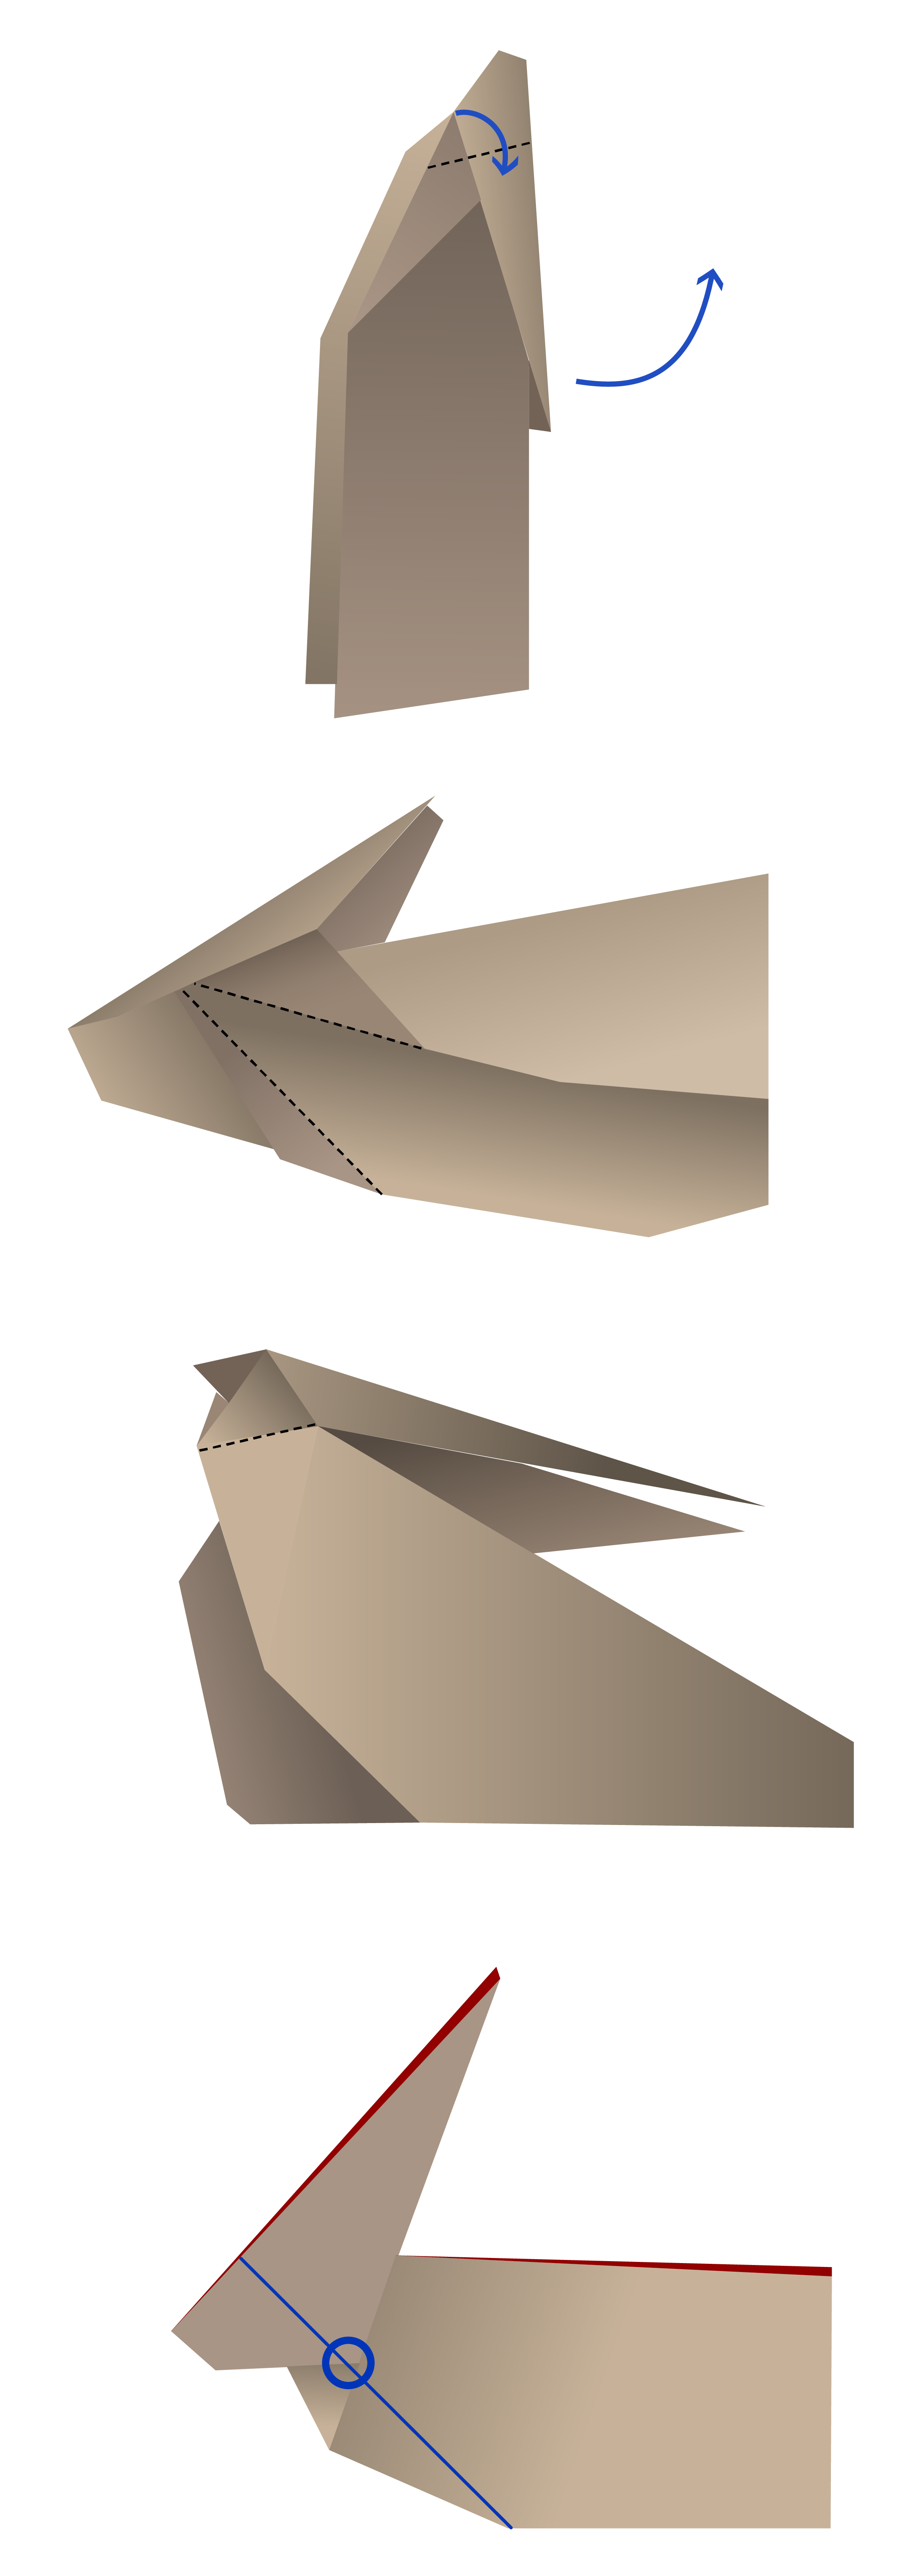
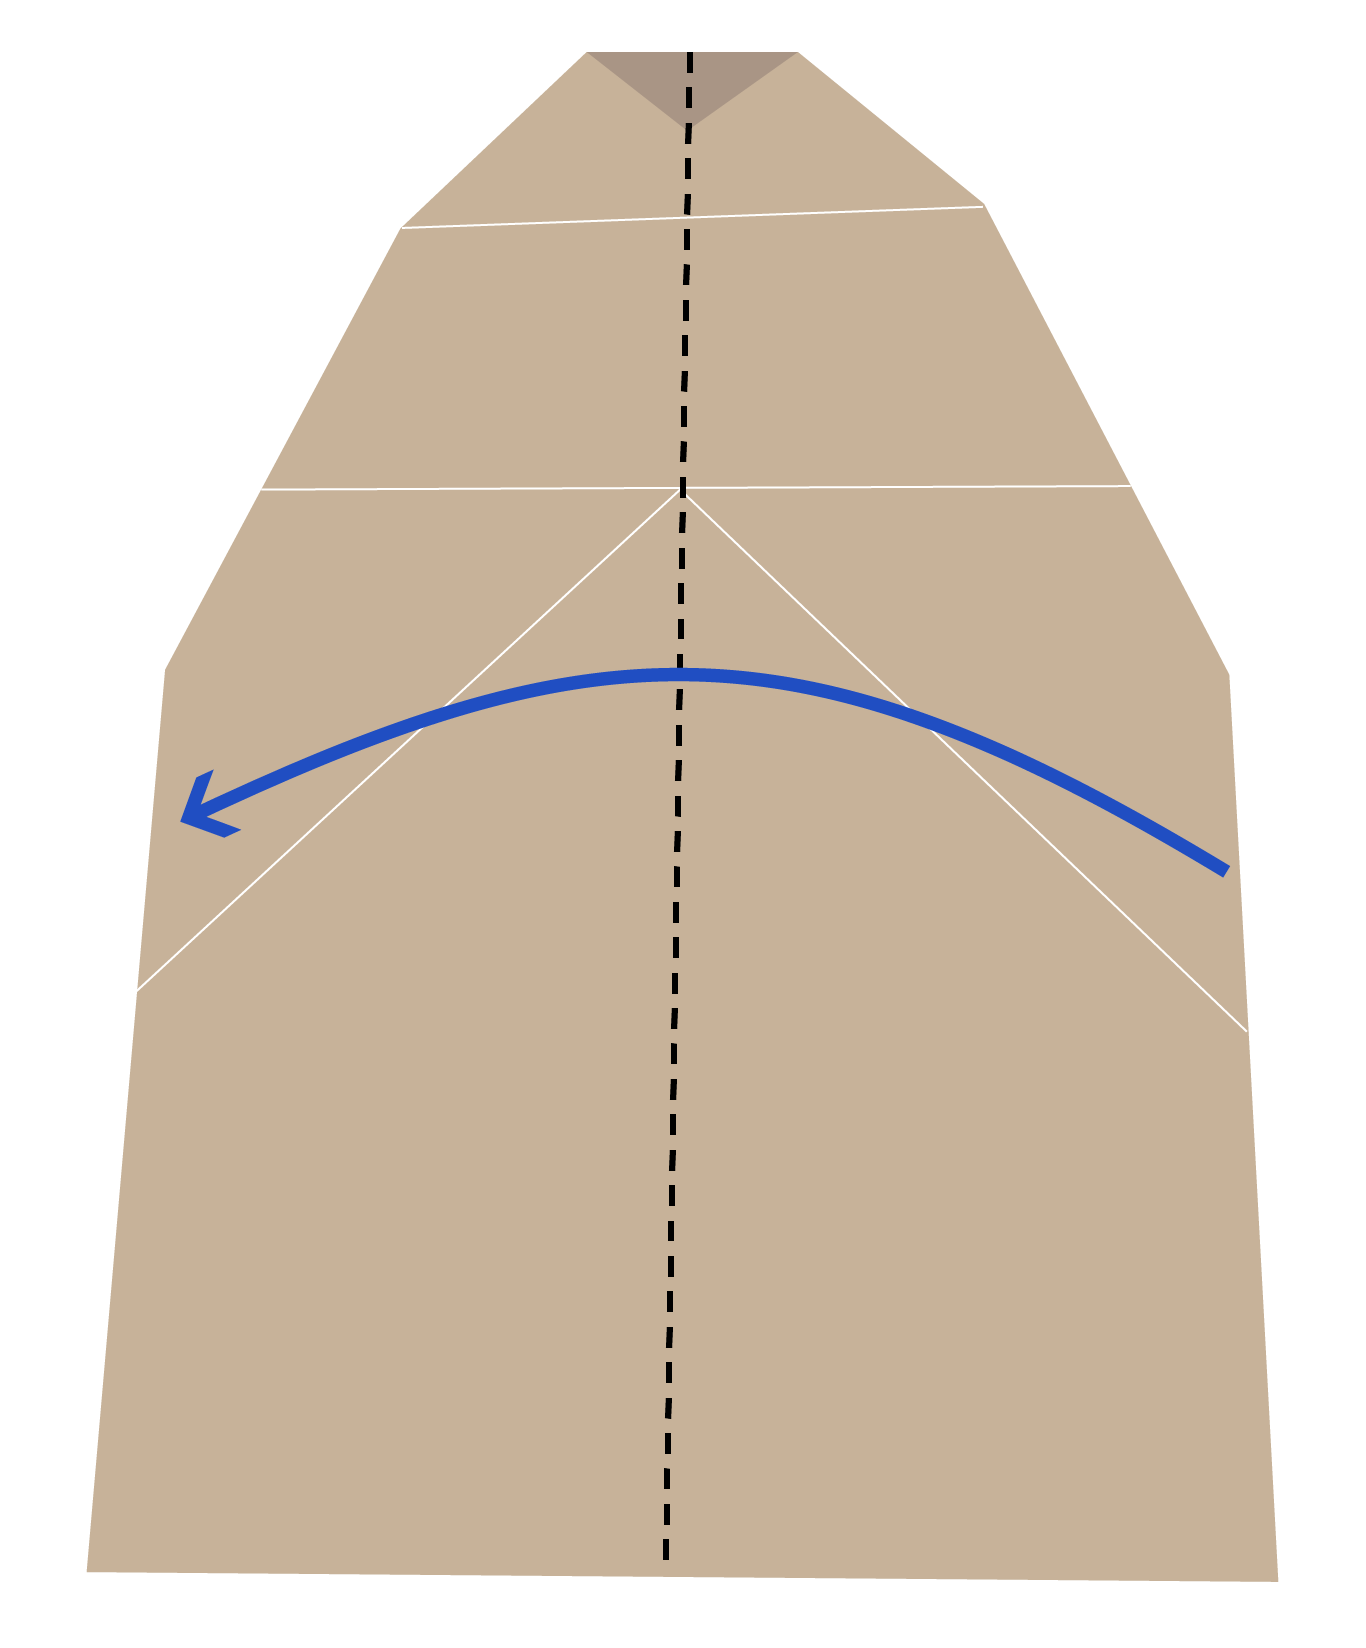
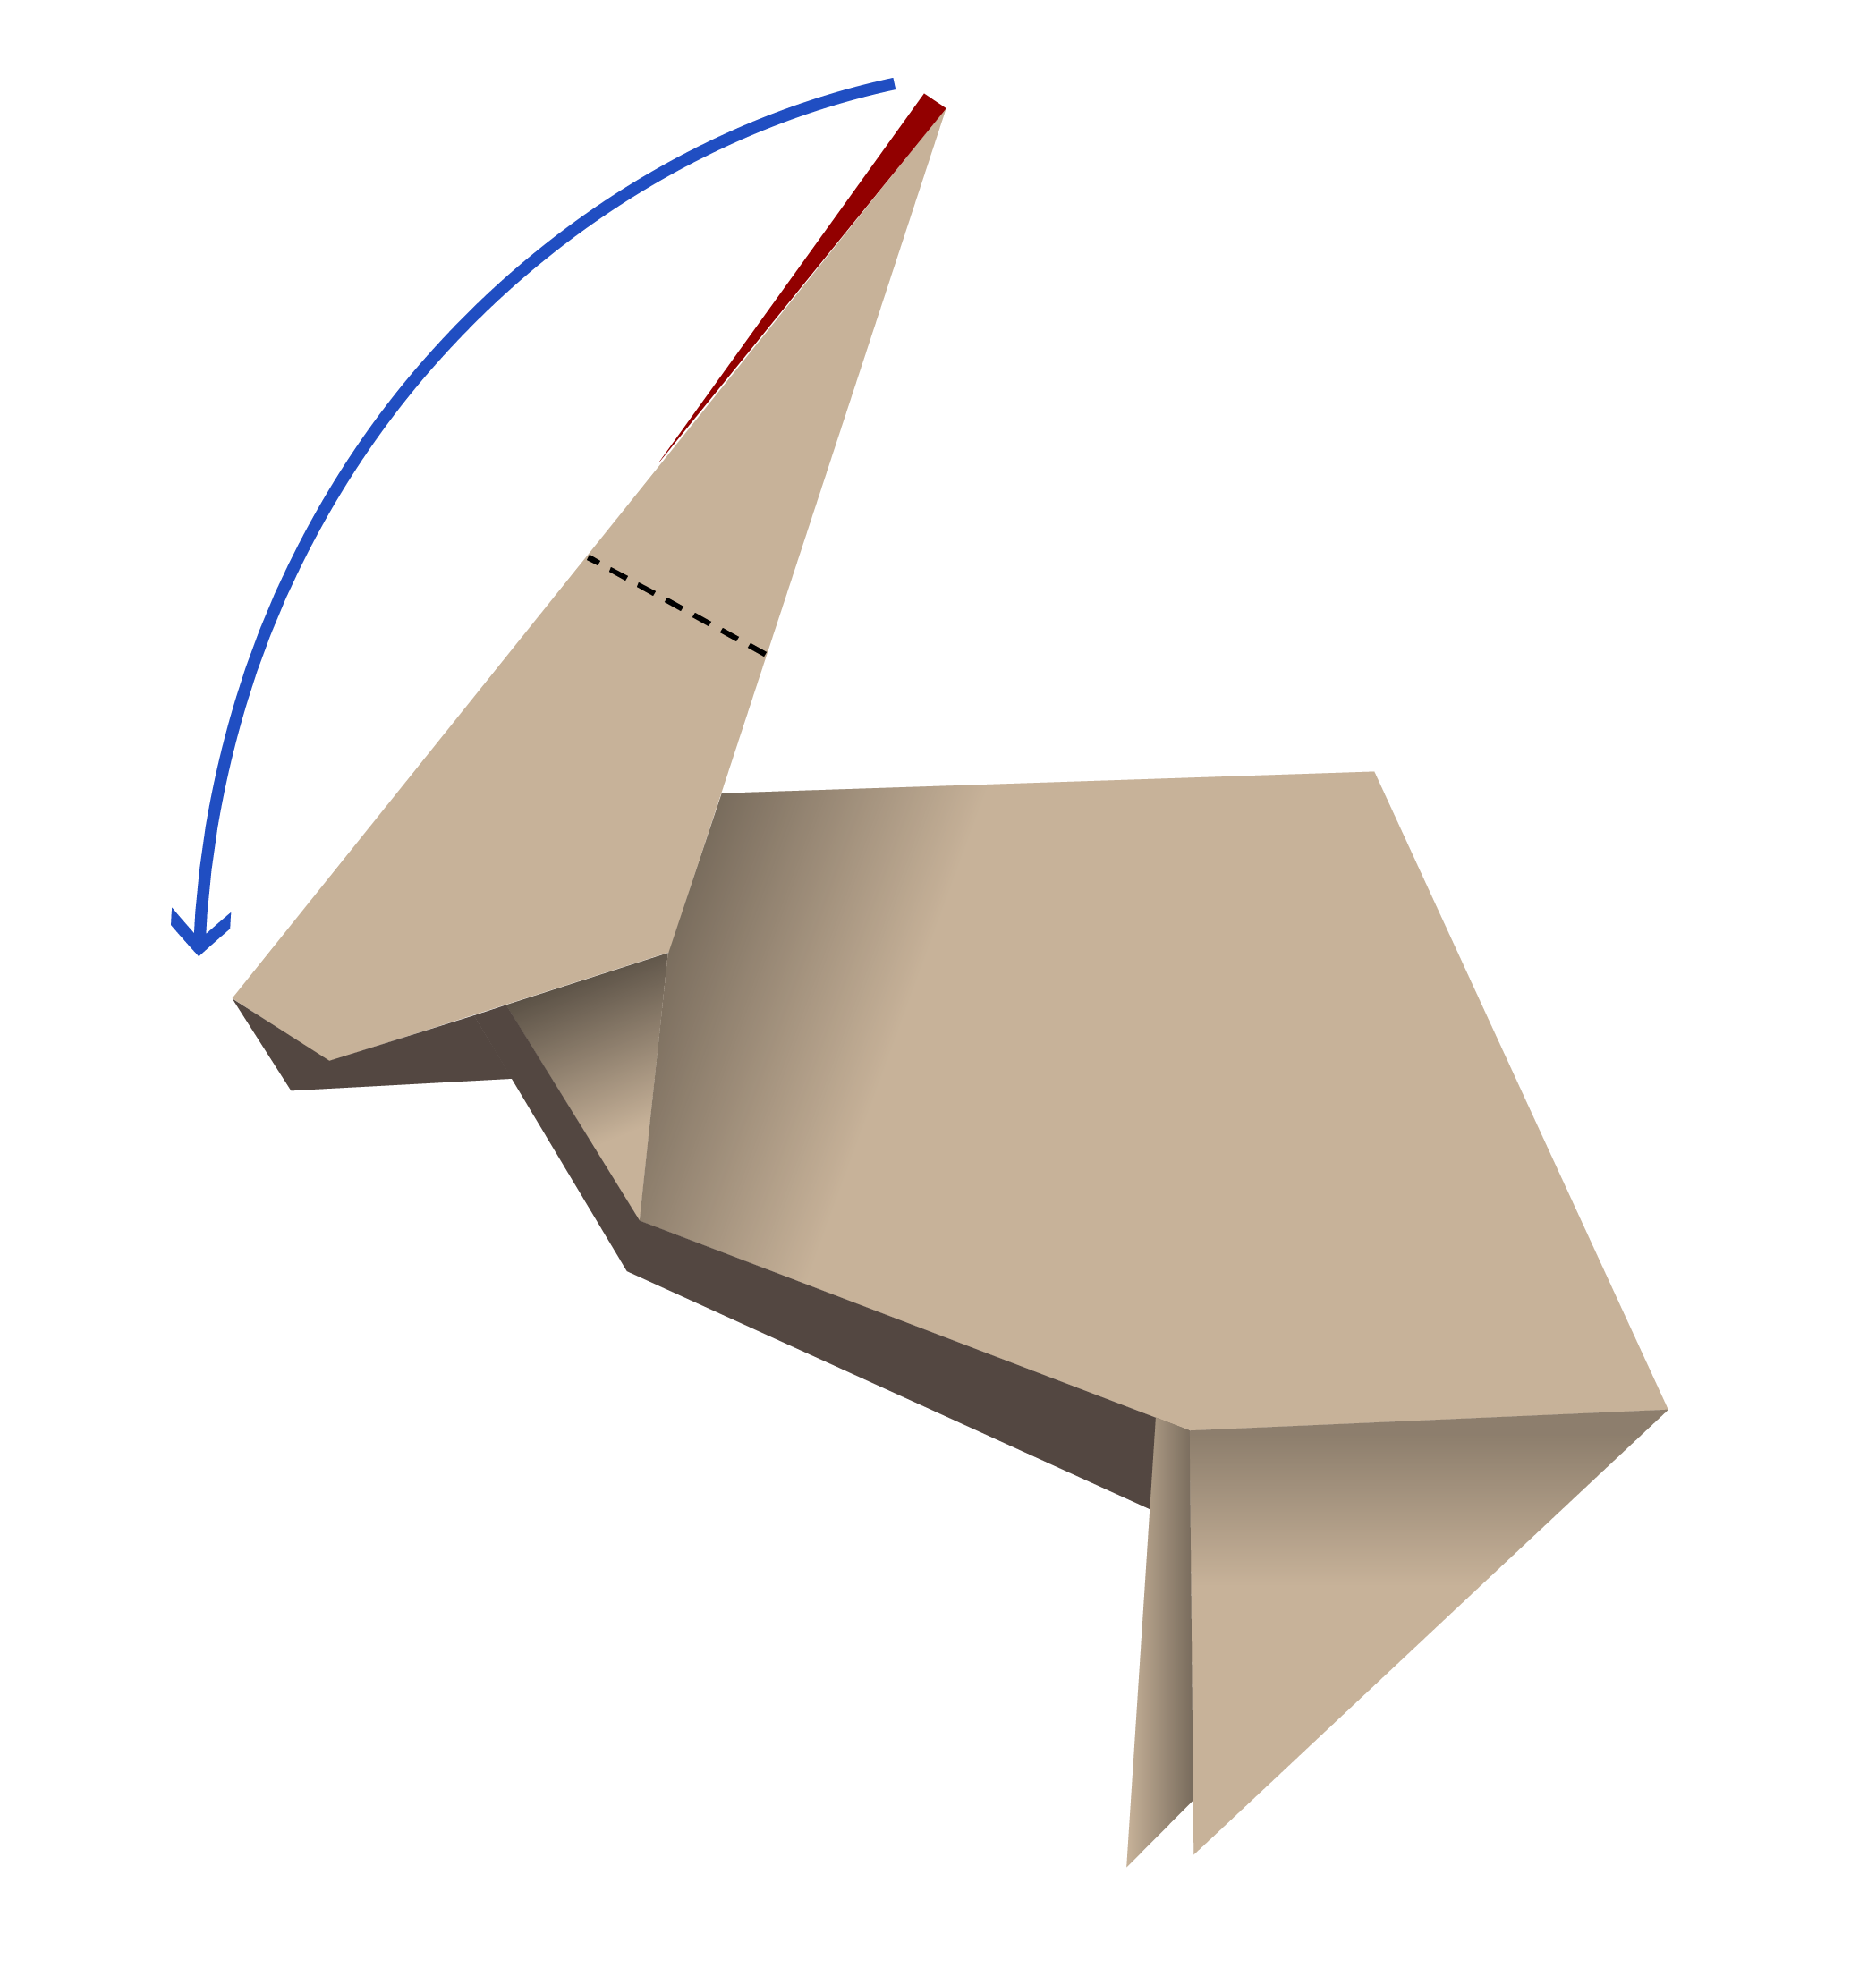
Step 15
Gently pull the triangle up to form the rabbit’s head – and now you can see its ears!
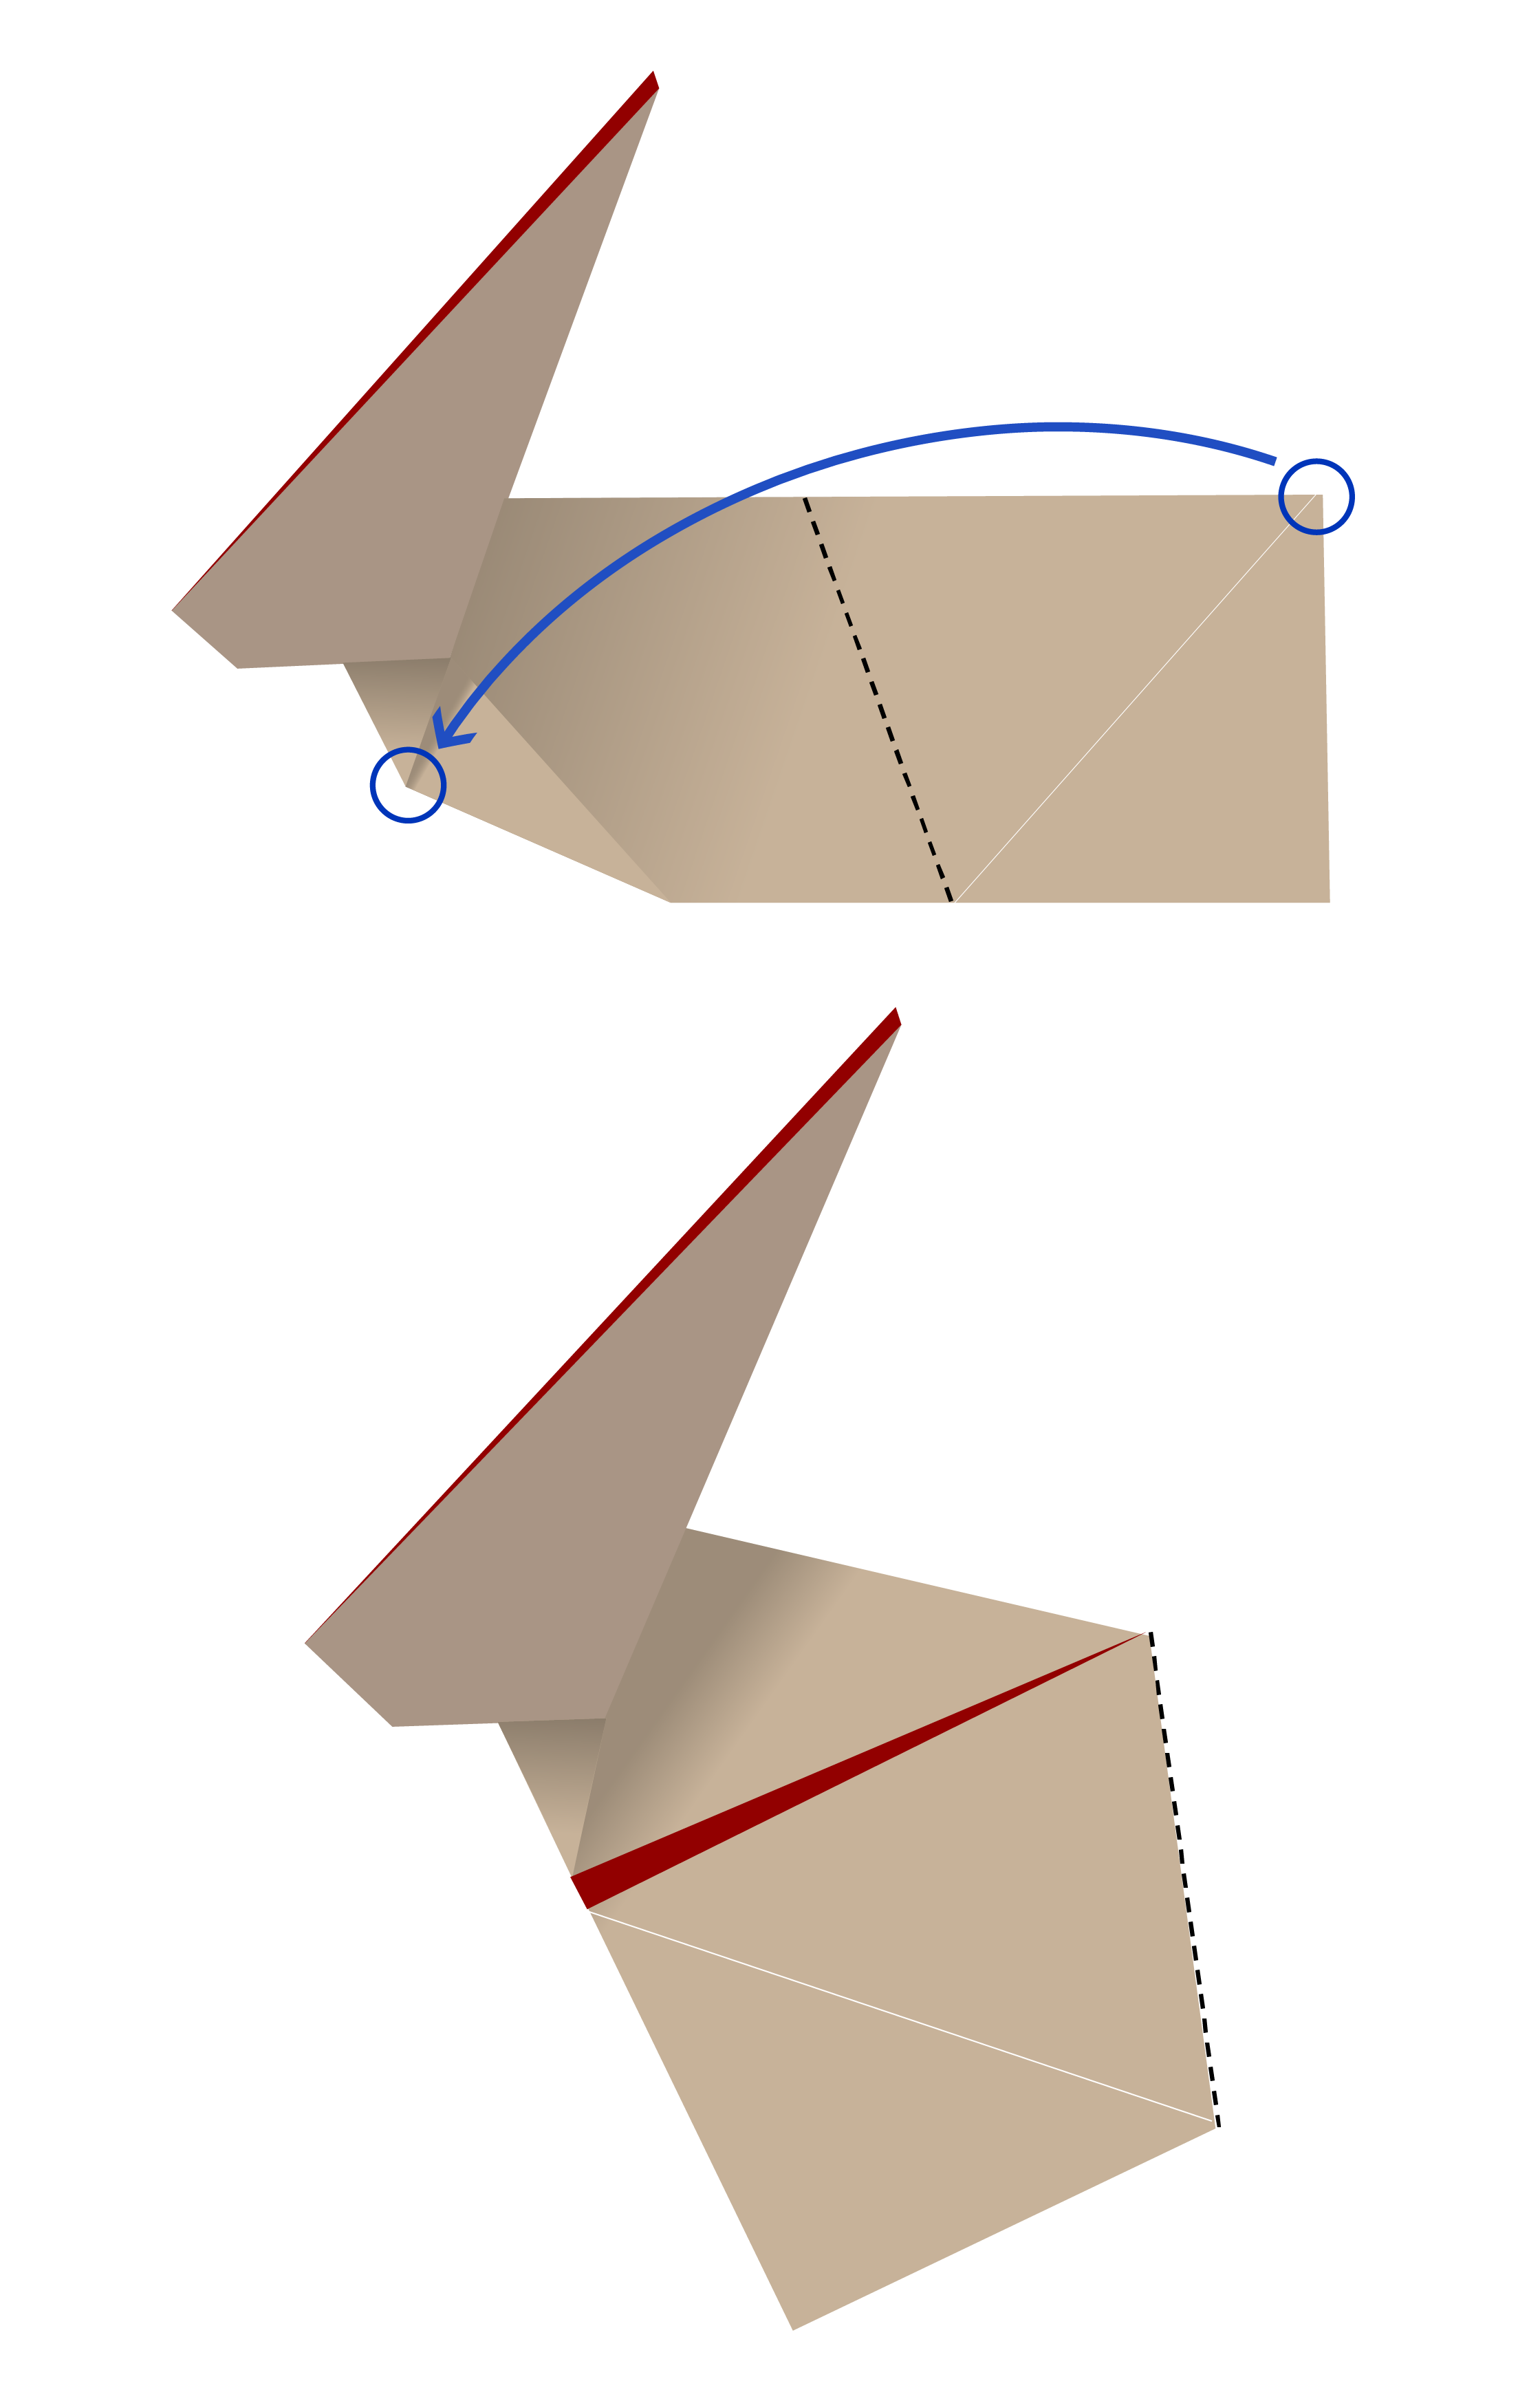
Step 16
Fold the rabbit’s back half along the dotted lines, and then unfold, to make a crease.
Step 17
Make in inside reverse fold on the crease, then flatten. This will be the base for the rabbit’s feet.
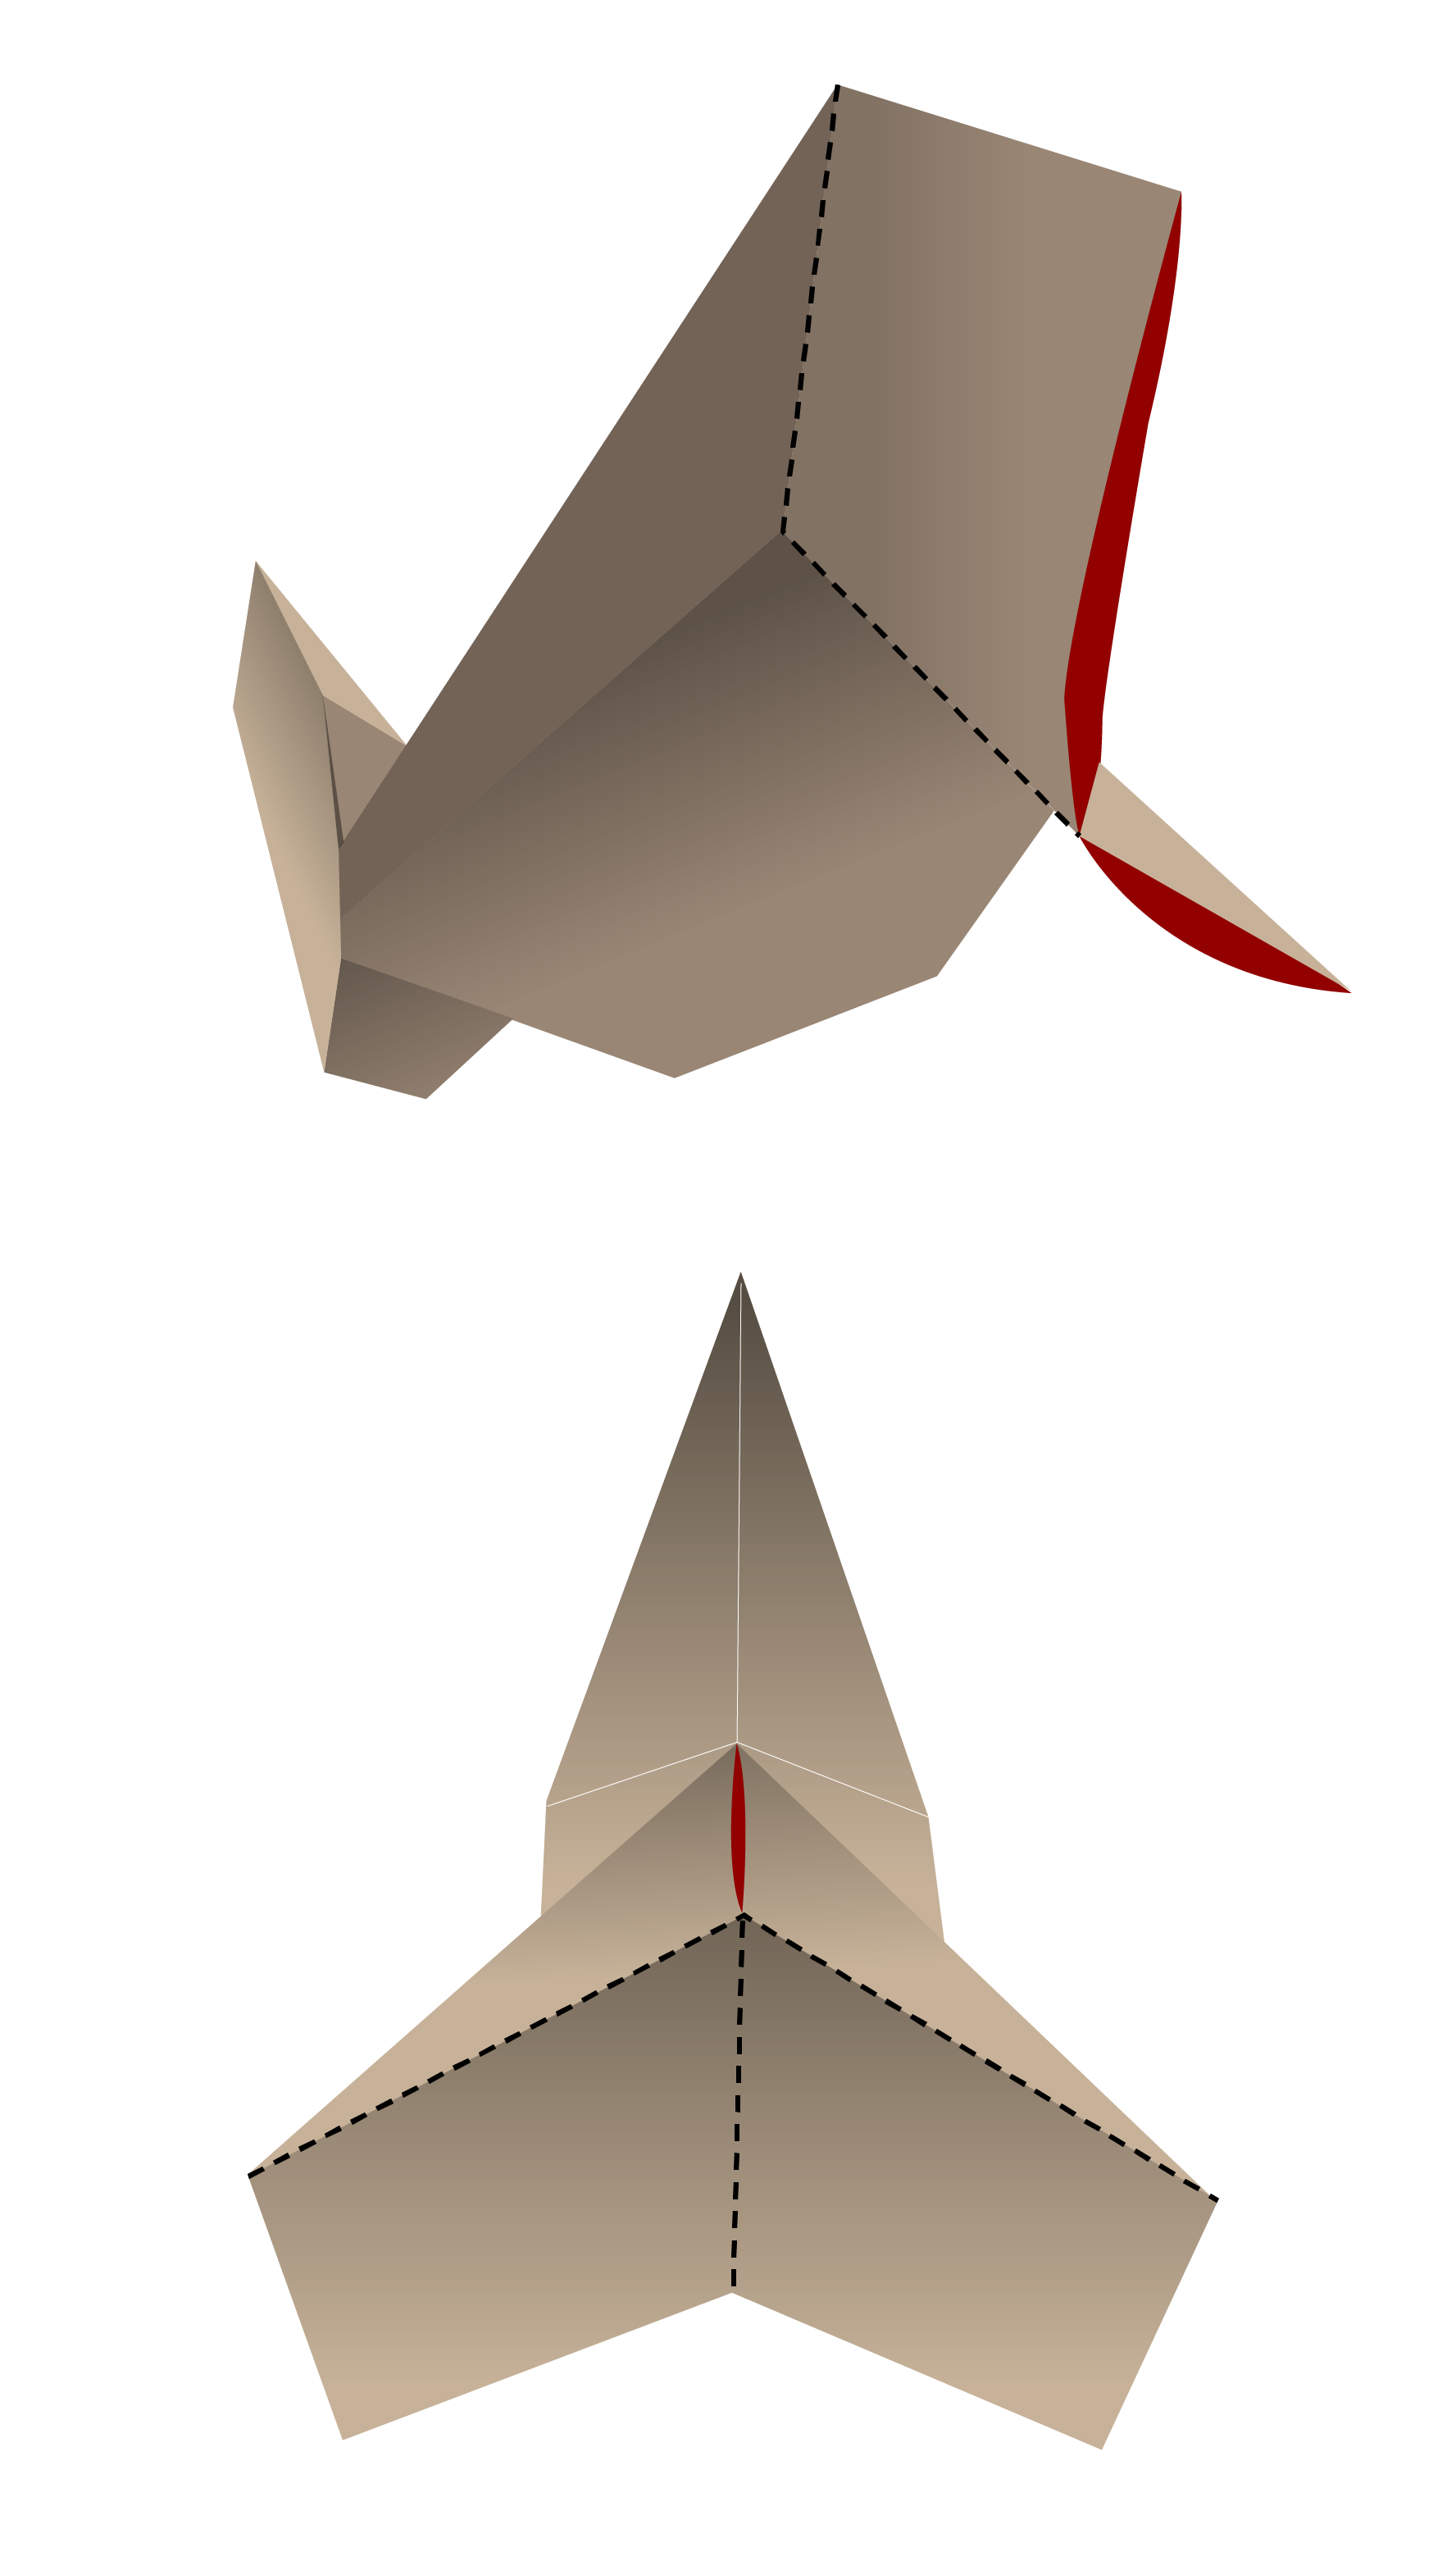
Step 18
Open up the flap at the bottom point, as arrow shown.
Step 19
Fold the flaps up as shown. Now the rabbit’s feet are done!
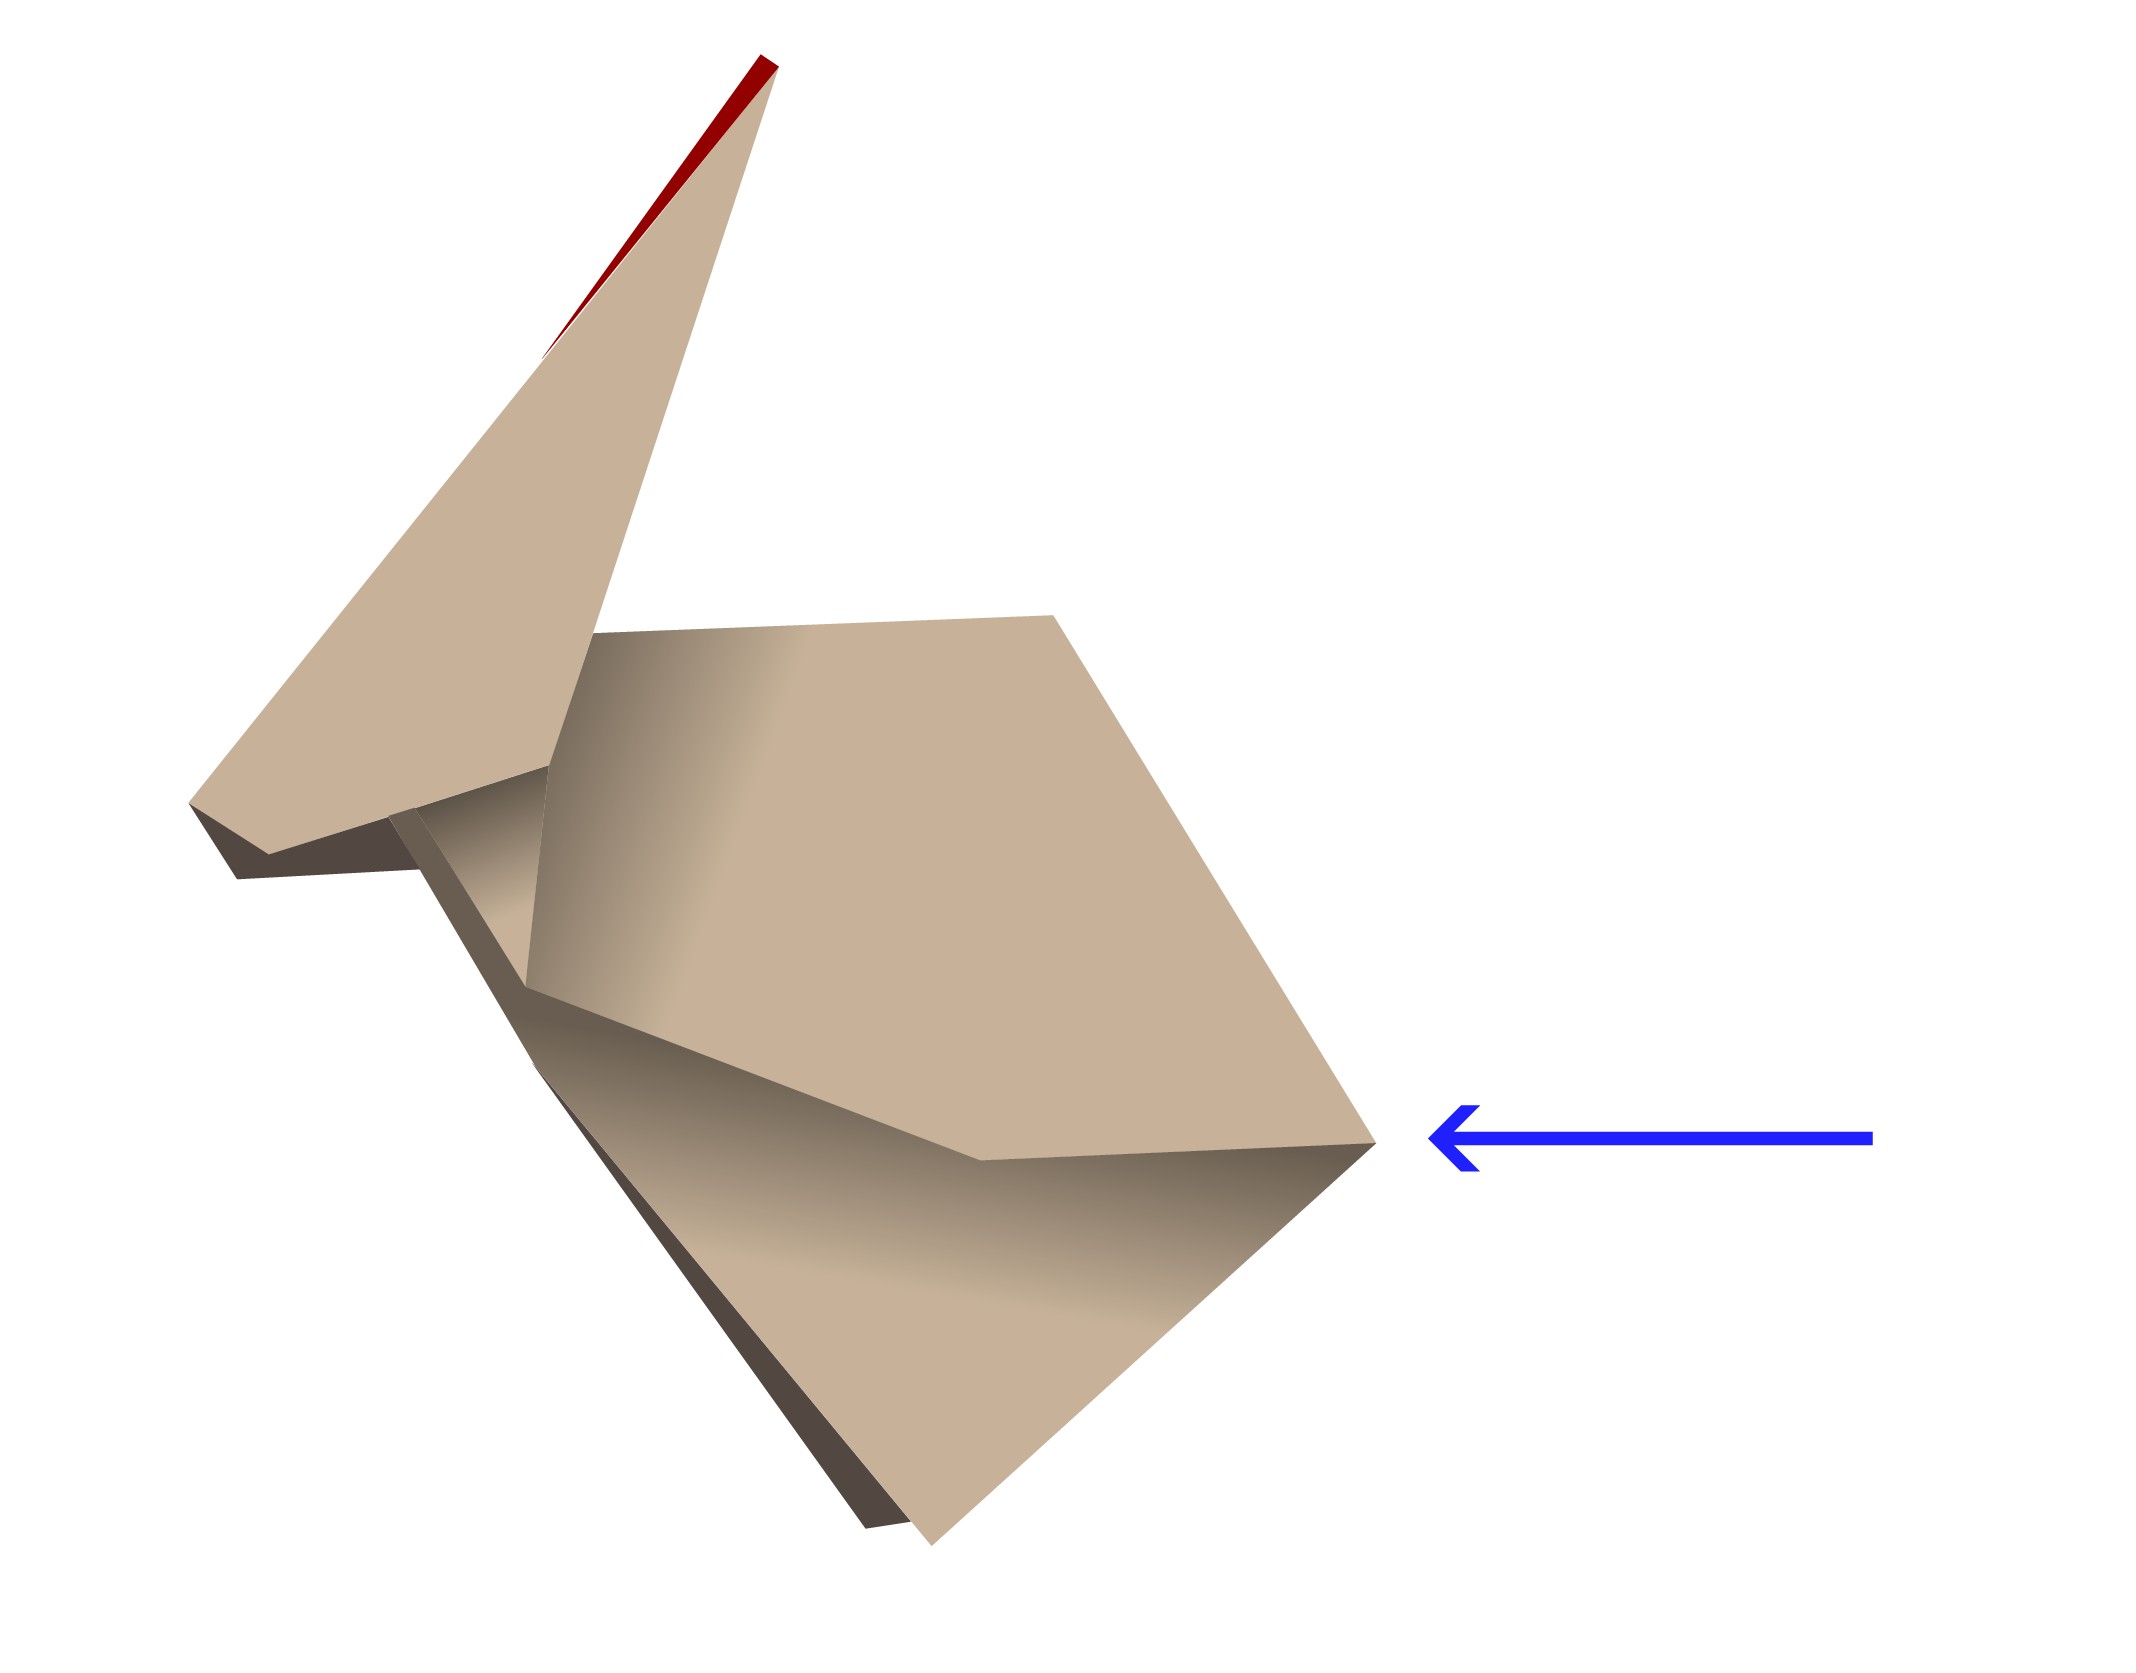
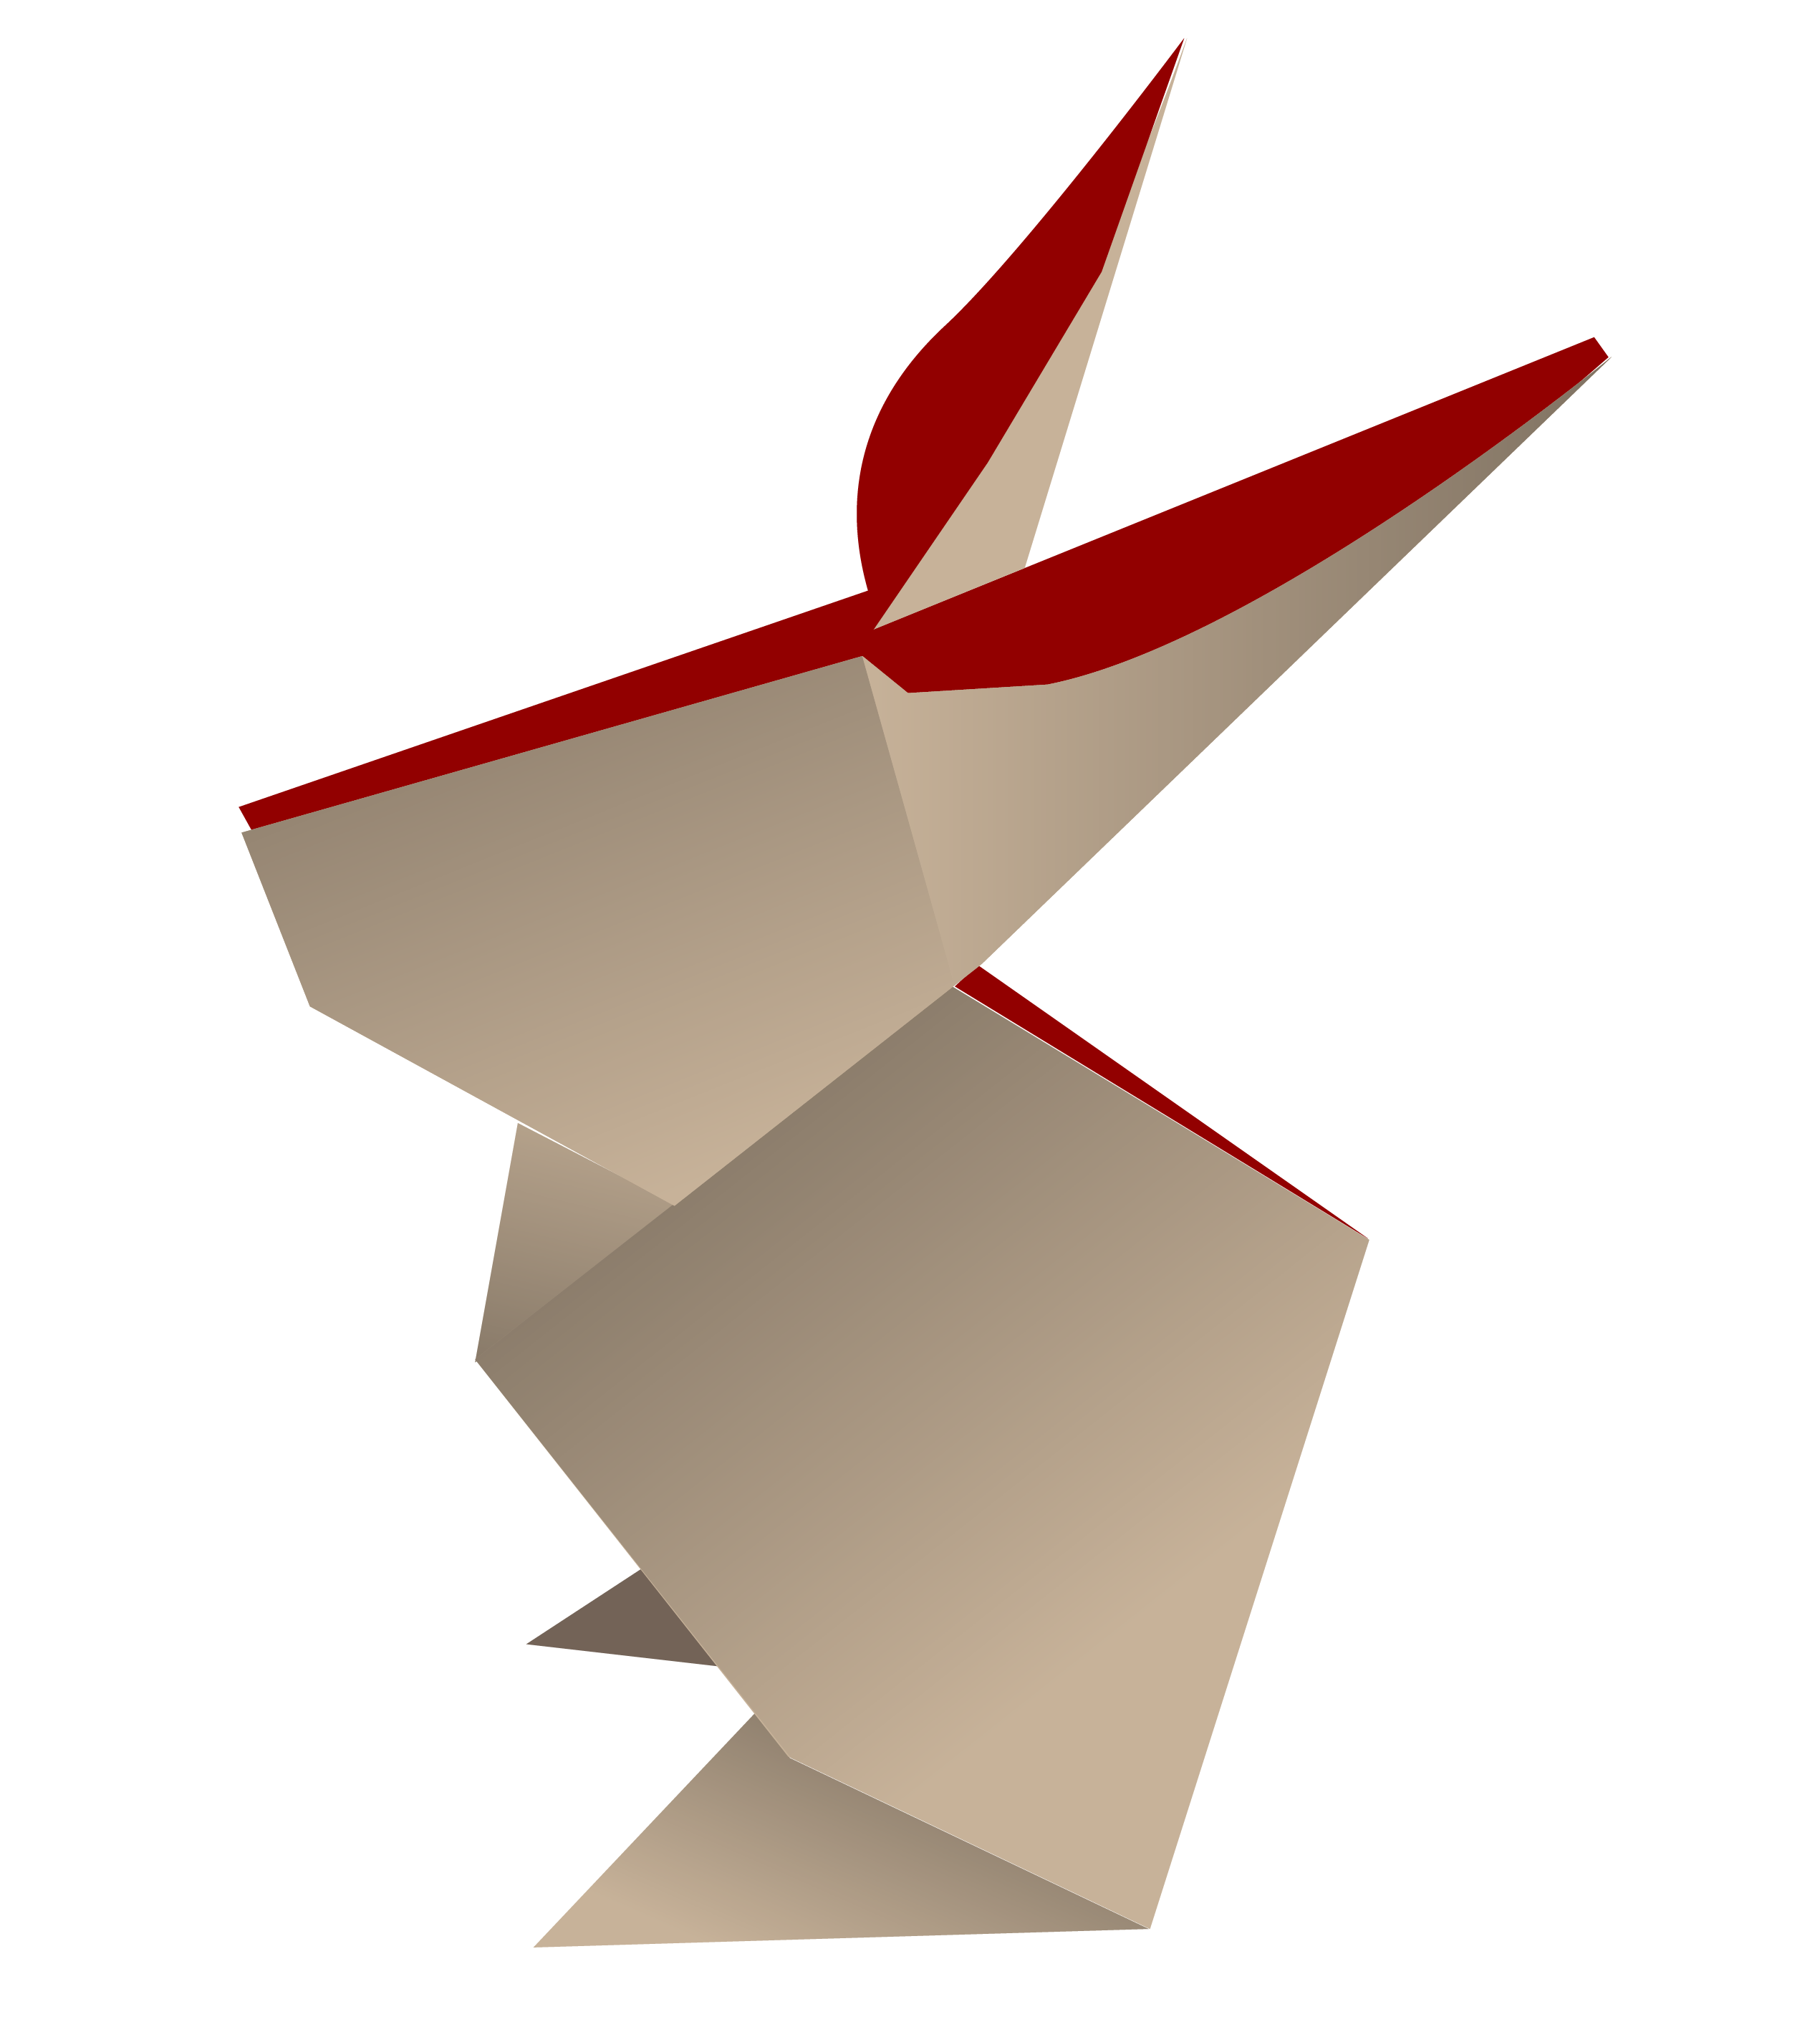
Step 20
Fold the rabbit’s ears down to create a crease, and slightly pull apart the layers to open its ears up.
Et voila – you now have your own cute rabbit origami, all ready for the Year of the Rabbit!
You can fold them in different coloured origami paper and different sizes, and let these cute rabbit origami crafts stand on your office desk or as part of your CNY home decorations! Hoppy Chinese New Year to all!
Check out Origami Tutorial’s website for more fun origami and step-by-step instructions!